Atavism Online – Development VM
Platform Recommendations/Requirements:
Preferred OS: Linux 64bit
Java: 8 (Atavism X.6-), Java 8 or 17 supported for Atavism X.7+
DB: MySQL 5 / MariaDB up to version 5.7 (or MariaDB equivalent), MySQL 8 supported for Atavism X.2+
Default Ports: 9005 TCP, 9010 UDP, 5042 TCP, 5052 UDP, 5566 TCP
Atavism 2.7: Unity 5.6 / 2017.1
Atavism 2018.1: Unity 5.6, 2017.x
Atavism 2018.2: Unity 5.6, 2017.x, 2018.1, 2018.2
Atavism 2018.3: Unity 5.6, 2017.x, 2018.x
Atavism 2019.1: Unity 2018.2, 2018.3, 2018.4, 2019.1
Atavism X: Unity 2018.4, 2019.1, 2019.2
Atavism X.1: Unity 2018.4, 2019.1, 2019.2, 2019.3, 2019.4
Atavism X.2: Unity 2018.4.2, 2019.1, 2019.2, 2019.3, 2019.4
Atavism X.3: Unity 2018.4.2, 2019.1, 2019.2, 2019.3, 2019.4
Atavism X.4: Unity 2019.4.0, 2020.1, 2020.2, 2020.3, 2021.1
Atavism X.5: Unity 2019.4.0, 2020.1, 2020.2, 2020.3, 2021.1
Atavism X.6: Unity 2019.4.0, 2020.1, 2020.2, 2020.3, 2021.1, 2021.2, 2021.3
Atavism X.7: Unity 2020.3, 2021.3
Atavism X.8: Unity 2020.3, 2021.3
Atavism X.9: Unity 2022.3
To speed up the start of development, the Atavism Team provides Virtual Machine (VM) build on VirtualBox.
This VM can be downloaded from Atavism Online Apanel.
Atavism development VM
http://download.virtualbox.org/virtualbox/UserManual.pdf
Import VM to VirtualBox
To import Atavism development VM to VirtualBox© go to:
File > Import Appliance (ctrl + I)
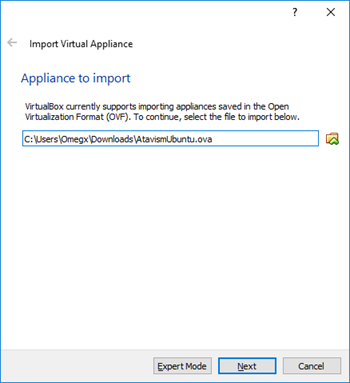
In this window, you will need to select the OVA file that you downloaded from APanel.
Thane clicks Next
The next screen will provide you with the summary of the import:
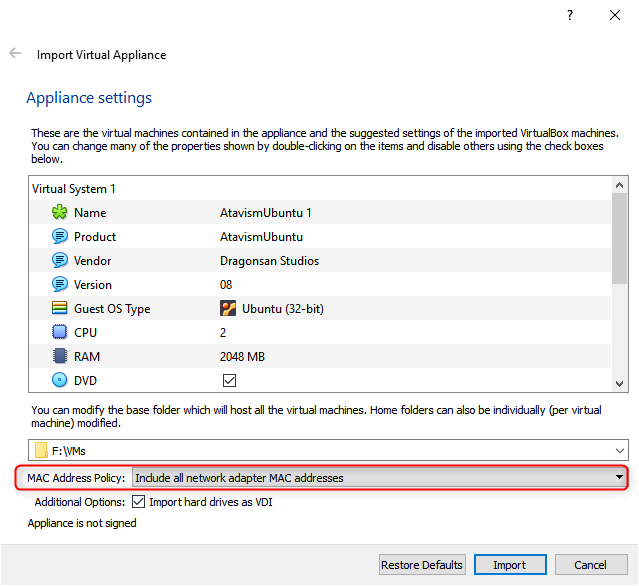
Click on Import
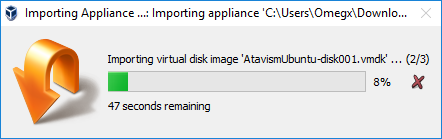
An import progress window will pop up:
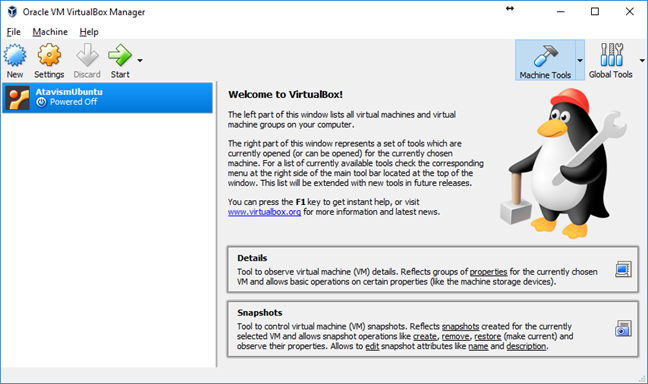
After successful import, you will see the new VM in VirtualBox Manager
You can modify the Settings of this VM (especially the network card) by clicking on the Settings button:
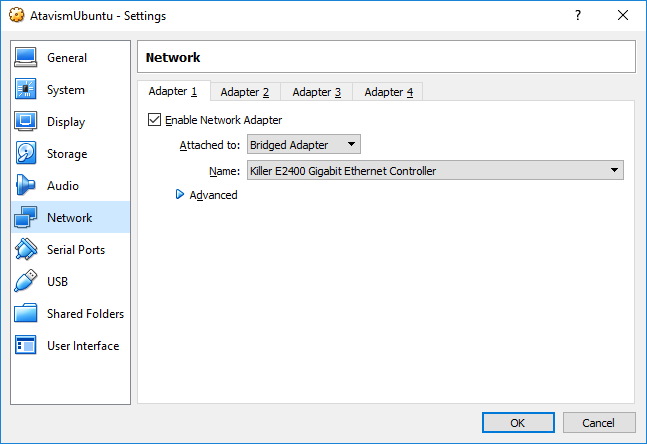
In the network section ensure that the VM is attached to the Bridged Adapter and Name of the adapter is the name of the NIC that is connected to your home/office network.
After you change settings to preferred by you can click on the Start arrow

This will start VM on your computer (a new window can pop up).
After some time (depending on your hardware) system will start and you can log in to it.
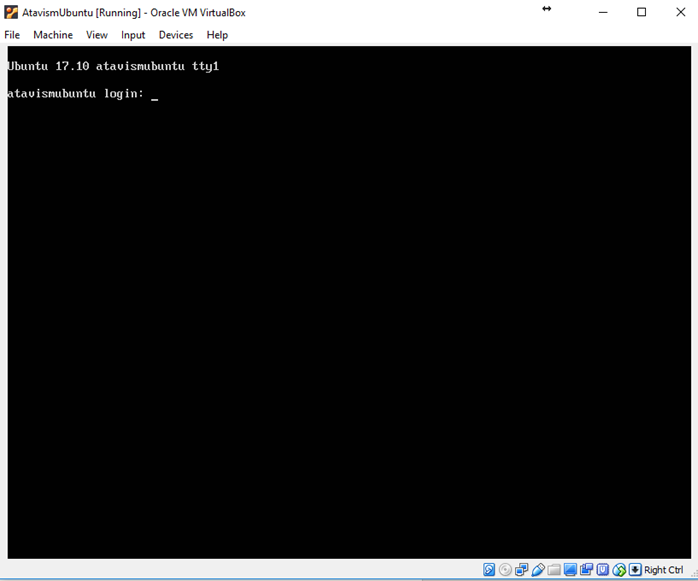
Login: root
Password: atavism
To change the password for root please run the command: passwd root
The system will ask you for the new password and will ask you to confirm the new password.
Check your network configuration:
In Windows OS open CMD and enter the command ipconfig /all and press enter – this will show something similes to this:
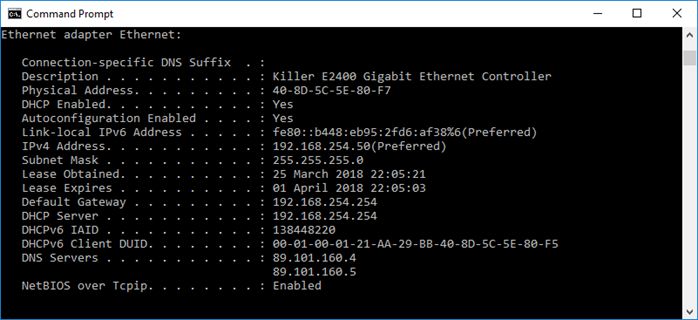
This will show you your:
- IP address
- Subnet Mask
- Gateway
Based on this information assign an IP address for your VM.
Please note that if you have more devices connected to the network ensure that the IP address that you will like to use is not in conflict with other systems (don’t use this same IP).
To change the IP address of the Atavism Development VM go to:
On Ubuntu do:
nano /etc/netplan/01-netcfg.yaml
Window witch network configuration will open:

In this config file assign an IP address from your LAN subnet and change the gateway address to match your firewall.
After you amend the file to save it by pressing F2 – on the bottom of the screen you will see dialogue (if you are happy with the changes press Y):

After you press Y system will ask where to save the file/filename:

Just press ENTER
Now to activate this config just run the command: netplan apply
You can check if the provided IP is active by running the command: hostname -I (this will display the active IP address).
You can also run a ping test from this VM to the network / Internet and from the local PC to this new server.
On CentOS do:
nano /etc/sysconfig/networking/devices/ifcfg-eth0
Window witch network configuration will open:
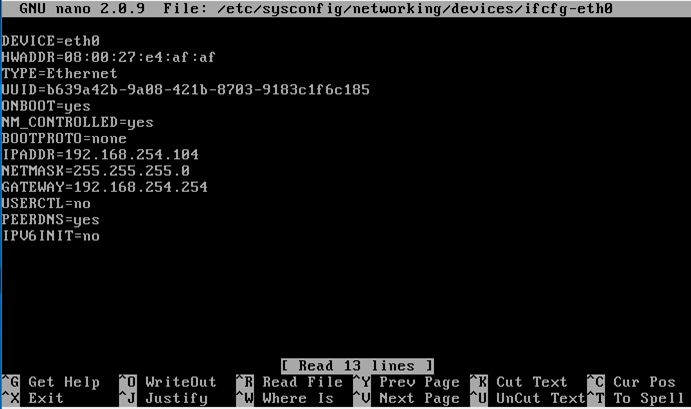
In this config file assign an IP address from your LAN subnet and change the gateway address to match your firewall.
After you amend the file to save it by pressing F2 – on the bottom of the screen you will see dialogue (if you are happy with the changes press Y):

After you press Y system will ask where to save the file/filename:

Just press ENTER
Now to activate this config just run the command: service network restart
This should give you output similes to this:

You can check if the provided IP is active by running the command: hostname -I (this will display the active IP address).
You can also run the ping test from this VM to the network / Internet and from the local PC to this new server.
Uploading Atavism Server software to VM
After you change network card settings you can upload Atavism_Server.zip to this VM.
One of the tools that you can use is WinSCP.
You can download it from the WinSCP website: https://winscp.net/eng/download.php
After you download and install this program you Can connect to the server using it.
After you open it WinSCP it will ask for connection details:
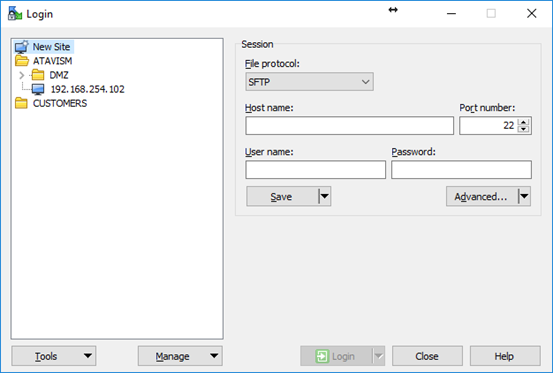
After configuring this connection (IP Address minimum) you can save these settings or just press Login.
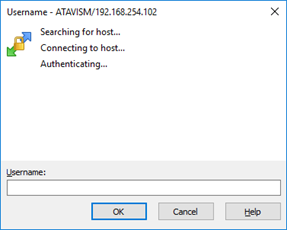
When you press Login you will be prompted for a username and for a password:
After you log in you should upload atavism_server_xxxx.zip into the default directory /root/:
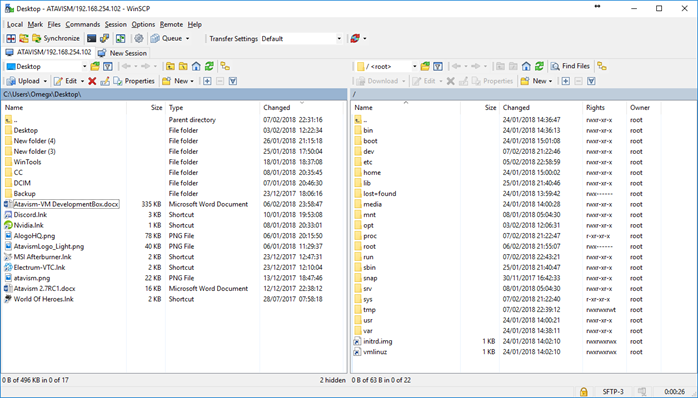
Select the file for upload and press F5.
In the next step, Virtual Machine within 2 minutes should unpack that package and after that, you should open your browser and try to enter the address as follows: http://<YourServerIPAddress>/atavism/installation/install.php
where <YourServerIPAddress> is the IP that you set up in the previous step for the server.
You should see the information as on the screen below:
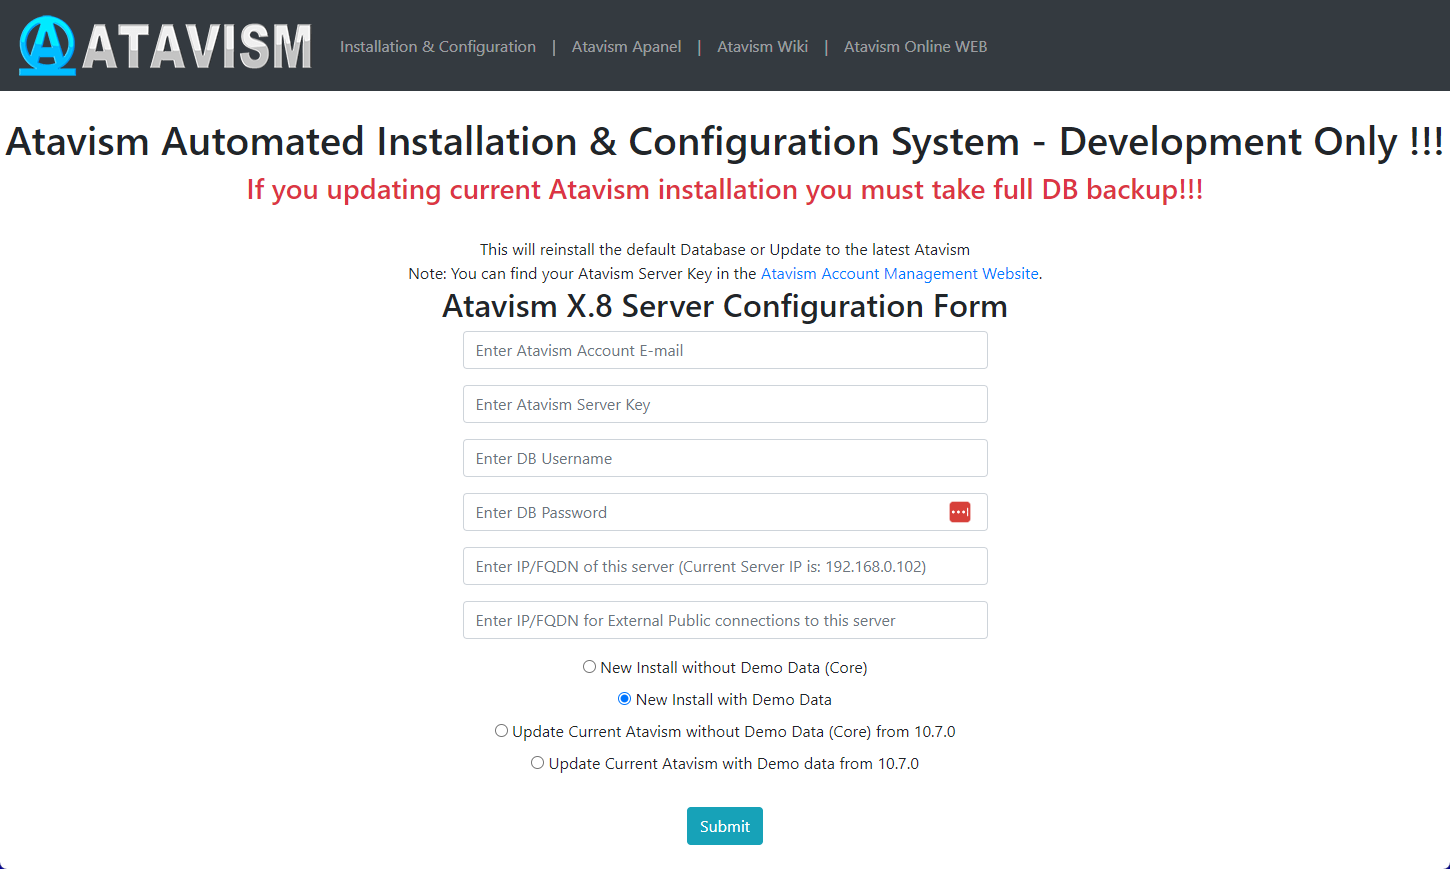
Fill in the data in the form:
Atavism Account Email: It’s the email on which you have registered your Atavism License
Atavism Server Key: Key which is assigned to your Atavism License. You can check it in your apanel account: https://apanel.atavismonline.com
DB Username: atavism (it’s default database user which is prepared for you)
DB Password: atavism (it’s the default database password for user atavism)
IP/FQDN of this server: Put your IP Address for your server which you set up in the previous step, for example, 192.168.0.102
IP/FQDN for External Public connections to the server: For connections within the network where your Virtual Machine resides put your IP Address for your server which you set up in the previous step, for example, 192.168.0.102
Install Type: Select Installation Type, for new users we recommend to make New Install with Demo Data, which will give you many examples of how to configure specific elements of Atavism.
Click the Submit button.
After the installation process, you should see a similar resume.

At this point, you need to import the Unity package and set it up by following this guide.