Building and Testing your AGIS
Atavism 10.6.0+
This guide assumes you are using Eclipse as your IDE for the AGIS code and have followed the instructions on Setting up the AGIS Project in Eclipse.
Building the AGIS jar using Eclipse
To build the AGIS jar click on File at the top left of Eclipse and choose Export.
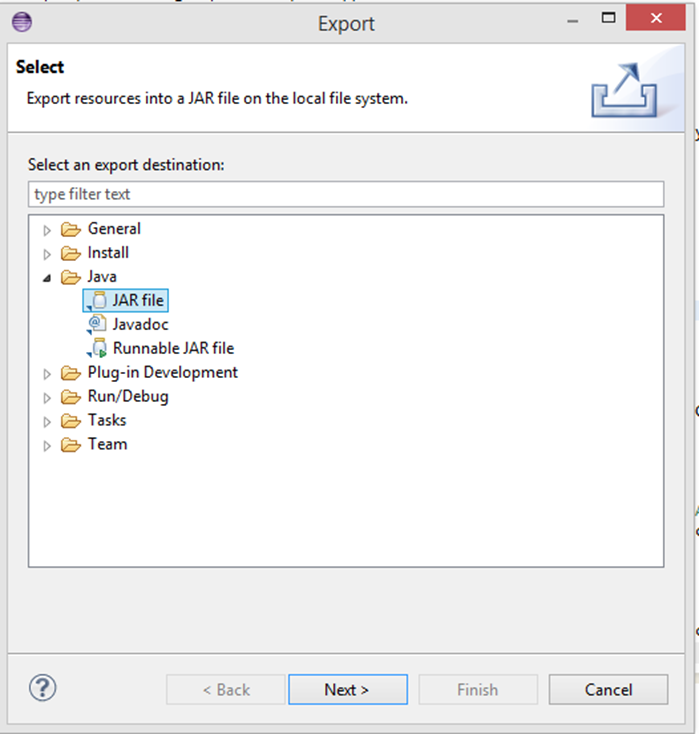
From the Export, the window expands the Java folder option and choose JAR file. Click Next.
At the Jar File Specification window, expand out your project and tick each package inside the project (as pictured).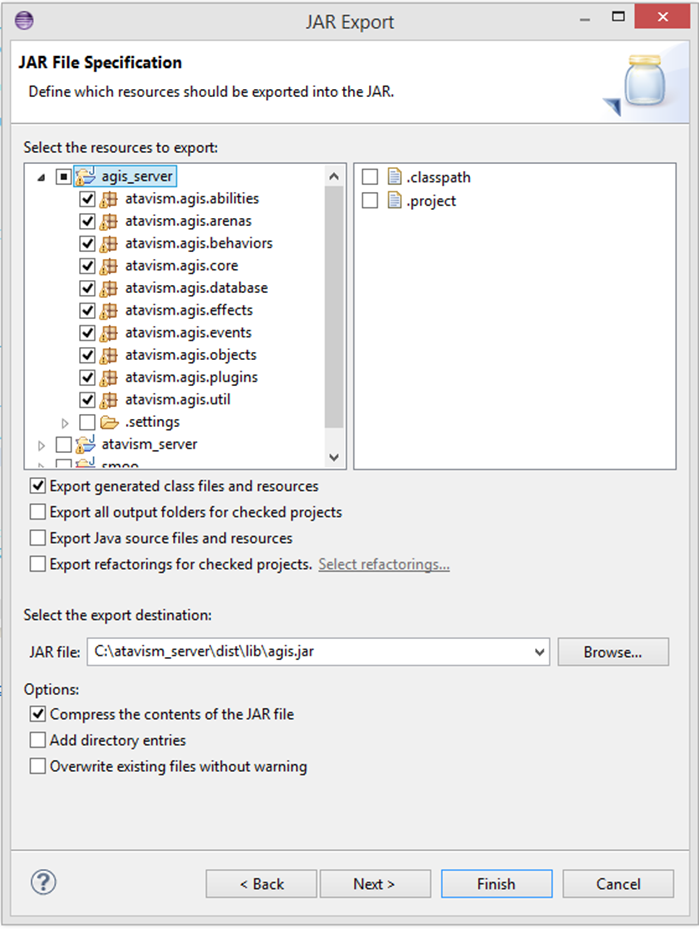
Set the export destination (make sure the file is called agis.jar) and click Finish.
Building the AGIS jar using Gradle
To build AGIS jar you have to prepare configurations files for gradle.
File settings.gradle
rootProject.name = 'agis'File build.gradle
plugins {
    id 'java'
}


repositories {
    mavenCentral()
}

dependencies {
    implementation 'io.micrometer:micrometer-registry-prometheus:1.7.3'
    implementation 'com.github.ben-manes.caffeine:caffeine:2.9.2'
    implementation 'org.recast4j:recast:1.4.2'
    implementation 'org.recast4j:detour:1.4.2'
    implementation 'org.recast4j:detour-dynamic:1.4.2'
    implementation 'org.recast4j:detour-extras:1.4.2'
    //local file
    implementation files('<path to other folder of the atavism server files>/tools.jar')
    implementation files('<path to other folder of the atavism server files>/recast4j-detour-crowd-1.4.2.jar')
    implementation files('<path to dist folder of the atavism server files>/lib/atavism.jar')
}

sourceCompatibility = 1.8
To build jar you have run gradle task build
Testing the AGIS jar file
Testing your exported jar file is easy. Just replace the existing agis.jar in the dist/lib folder of the server and start up the server!
Atavism 10.5.0-
This guide assumes you are using Eclipse as your IDE for the AGIS code and have followed the instructions on Setting up the AGIS Project in Eclipse.
Building the AGIS jar
To build the AGIS jar click on File at the top left of Eclipse and choose Export.
From the Export, the window expands the Java folder option and choose JAR file. Click Next.
At the Jar File Specification window, expand out your project and tick each package inside the project (as pictured).
Set the export destination (make sure the file is called agis.jar) and click Finish.
Testing the AGIS jar file
Testing your exported jar file is easy. Just replace the existing agis.jar in the dist/lib folder of the server and start up the server!