AGIS Plugin – Guild Example
Implementing a Guild System into Atavism – Part I
The process of creating a new plugin for Atavism can be quite daunting the first time with many files needing to be altered to make it all work. This guide will walk you through every step, explaining why along with giving you a usable example to implement: The Guild System.
Prerequisites:
You will need access to the AGIS code for Atavism and have it loaded up as a project in an IDE such as Eclipse. You can find a guide on setting up the AGIS project in Eclipse here https://unity.wiki.atavismonline.com/project/setting-up-the-agis-in-eclipse/ and https://unity.wiki.atavismonline.com/project/building-and-testing-your-agis/
Step 1: Creating the Plugin.java file
The first thing is to create a Plugin file in the AGIS project. This Plugin file will handle all the messages from the client in relation to guide activities, such as a request to create a guild, or sending a guild chat message.
A GuildPlugin.java file already exists in the atavism.agis.plugins package for the project but it is missing a few things to get started. First, it needs a constructor which will set the PluginType so the rest of the server knows:
    public GuildPlugin() {
        super(GUILD_PLUGIN_NAME);
        setPluginType("Guild");
    }
It is also recommended to change the GUILD_PLUGIN_NAME to “Guild” to follow general naming conventions. Finally, it can be useful to add a logger:
protected static final Logger log = new Logger("Guild");The onActivate() function may already exist, and if not you should create it. The onActivate() function is called when the Plugin starts and it can be used for creating message filters, message hooks and loading anything from the database that the plugin will need. It doesn’t need anything for now, but it can be useful to have a log message so a message will appear in the logs when the Plugin is activated (really useful for making sure it has started) and having a registerHooks() function call. If there is another code, clear it out so you only have:
    public void onActivate() {
		Log.debug("GUILD PLUGIN: activated");
		registerHooks();
    }
Finally, add the registerHooks() function. It will be empty for the moment, but later on, the message hooks will be added here to define what Hooks are run when certain messages are received. It will look like:
    protected void registerHooks() {
    }
At this point your GuildPlugin.java file should look like:
package atavism.agis.plugins;

import atavism.msgsys.Message;
import atavism.msgsys.MessageTypeFilter;
import atavism.server.engine.*;
import atavism.server.objects.Entity;
import atavism.server.plugins.ObjectManagerClient;
import atavism.server.plugins.WorldManagerClient;
import atavism.server.plugins.WorldManagerClient.ExtensionMessage;
import atavism.server.util.Log;
import atavism.server.util.Logger;

import java.util.*;
import java.io.Serializable;

public class GuildPlugin extends EnginePlugin {

	public GuildPlugin() {
        super(GUILD_PLUGIN_NAME);
        setPluginType("Guild");
      }

	public String getName() {
		return GUILD_PLUGIN_NAME;
	}

	public static String GUILD_PLUGIN_NAME = "Guild";

	protected static final Logger log = new Logger("Guild");

	public void onActivate() {
		Log.debug("GUILD PLUGIN: activated");
		registerHooks();
	}

	protected void registerHooks() {
	}
}
Step 2: Creating the Client.java file
The second step is to create a Client.java file inside the same atavism.agis.plugins package which contains message definitions for the Plugin class and static functions to send those messages from other plugins. To start with the class will be empty, but later stages of the plugin development will see it get filled.
Note: Don’t get confused by the name ‘Client’. The name client typically refers to the players computer running your game, but in this case, it is an internal server messaging file that assists in defining how other plugins and players clients can interact with the plugin.
For this stage create a new GuildClient.java file (if one doesn’t already exist) and make sure the contents looks like:
package atavism.agis.plugins;

import java.io.Serializable;
import atavism.msgsys.MessageType;
import atavism.server.util.*;
import atavism.server.engine.*;
import atavism.server.messages.*;
public class GuildClient {
	protected GuildClient() {
	}
}
Step 3: Creating the Python script to register the Plugin
Once the Plugin and Client files have been created a Python script needs to be created that will register the plugin and can also be used to define other settings if wanted without then having to re-compile the AGIS code. These python scripts go in the config/world folder of the server.
The register plugin line of code simply calls Engine.registerPlugin(plugin_class_name). In this guide the Plugin class was called “GuildPlugin” and it was in the atavism.agis.plugins package. The line of code will then look like:
Engine.registerPlugin("atavism.agis.plugins.GuildPlugin")The file will need some import statements as well. For this example create a file called guildplugin.py in the config/world folder and copy the following text into it:
from java.lang import *
from java.util import *
from java.util.concurrent import *
from atavism.agis import *
from atavism.agis.plugins import *
from atavism.server.engine import *

Engine.registerPlugin("atavism.agis.plugins.GuildPlugin")
Since version 10.8.0 you need to add in class src\atavism\agis\server\ServerStarter.java
private static void startGuild() {
        Engine.registerPlugin("atavism.agis.plugins.GuildPlugin");
}
Step 4: Adding the Plugin to the server start-up script
The final step for getting a plugin working is to add the name to the list of Plugins in the start-up script and add the python script from step 3 to one of the server processes to run it.
Open up the world.sh file (located in the bin folder of the server) and look for the line that starts with:
PLUGIN_TYPES=It is located at roughly line 250. This line contains a list of all Plugins the server needs to know about and has some other symbols accompanying it. Add:
-p Guild,1To the end of the string so it will look like:
PLUGIN_TYPES="-p Login,1 -p Proxy,1 -p ObjectManager,1 -p WorldManager,1 -p Inventory,1 -p MobManager,1 -p Quest,1 -p Faction,1 -p Instance,1 -p Group,1 -p Combat,1 -p ClassAbility,1 -p Domain,1 -p DataLogger,1 -p Arena,1 -p Social,1 -p Crafting,1 -p Voxel,1 -p Guild,1"The name “Guild” in this case refers back to what the GUILD_PLUGIN_NAME variable was set to in the GuildPlugin.java file.
While still in the world.sh file it is now time to add the python script to a server process. A new server process could be made, but given the guild plugin is not a heavy duty one at this stage it can be added to an existing one. For this guide, it will be added to the objmgr process (which also means its log messages will show up in the objmgr.out log).
At roughly line 327 the code to start the objmgr process begins. Part of the code is a list of scripts to be run when the process is started:
$CMDLINE_PROPS \
        -i "${AO_COMMON_CONFIG}"/aomessages.py \
        -i "${AO_WORLD_CONFIG}"/worldmessages.py \
        -t "${AO_COMMON_CONFIG}"/typenumbers.txt \
        "${AO_COMMON_CONFIG}"/global_props.py \
        "${AO_WORLD_CONFIG}"/global_props.py \
        "${AO_WORLD_CONFIG}"/templates.py \
        "${AO_COMMON_CONFIG}"/obj_manager.py \
        "${AO_WORLD_CONFIG}"/mobs_db.py \
        "${AO_WORLD_CONFIG}"/items_db.py \
        "${AO_WORLD_CONFIG}"/craftingplugin.py \
        "${AO_WORLD_CONFIG}"/extensions_objmgr.py \
        "${AO_COMMON_CONFIG}"/datalogger.py \

Simply add a new line for the guildplugin.java file right at the end of that:
         "${AO_WORLD_CONFIG}"/guildplugin.py \
The AO_WORLD_CONFIG stands for the config/world folder.
The whole objmgr process code will now look like:
    java \
        ${JAVA_FLAGS} \
        -Datavism.loggername=objmgr \
        atavism.server.engine.Engine \
	$CMDLINE_PROPS \
        -i "${AO_COMMON_CONFIG}"/aomessages.py \
        -i "${AO_WORLD_CONFIG}"/worldmessages.py \
        -t "${AO_COMMON_CONFIG}"/typenumbers.txt \
        "${AO_COMMON_CONFIG}"/global_props.py \
        "${AO_WORLD_CONFIG}"/global_props.py \
        "${AO_WORLD_CONFIG}"/templates.py \
        "${AO_COMMON_CONFIG}"/obj_manager.py \
        "${AO_WORLD_CONFIG}"/mobs_db.py \
        "${AO_WORLD_CONFIG}"/items_db.py \
        "${AO_WORLD_CONFIG}"/craftingplugin.py \
        "${AO_WORLD_CONFIG}"/extensions_objmgr.py \
        "${AO_COMMON_CONFIG}"/datalogger.py \
        "${AO_WORLD_CONFIG}"/guildplugin.py \
        &
#        "${AO_COMMON_CONFIG}"/billing.py \

    write_pid objmgr $!
From here, save the file and start the server. Look into the objmgr.out log for this log message:
GUILD PLUGIN: activatedIf the log message is present then the Guild Plugin is now running. Now it’s time to make it do something meaningful.
Since version 10.8.0 you need to add in class src\atavism\agis\server\AllInOneServer.java
In the postScript function you need to add the call of the newly created function in ServerStarter
    private static void postScript() {
        setGlobalProperties();
        startArena(); // no deps
        startBuilder(); // no deps
        startFaction(); // no deps
        startObjectManager(); // no deps
        startPrefab(); // no deps
        startQuest(); // no deps
        startCombat(); // no deps
        startGuild();

        startAuction(); // dep: Inventory
        startWeather(); // dep: Combat
        startWorldManager(); // dep: Combat
        startMob(); // dep: ObjectManager,WorldManager,Inventory,Quest,Social
        startInstance(); // dep: ObjectManager,Quest,MobManager,Inventory,WorldManager,Combat
        startLogin(); // dep: ObjectManager,Instance
        // startProxy(); // dep: Instance
        startChat(); // dep: Proxy
    }
Implementing a Guild System into Atavism – Part II
The next step in implementing the guild system is to create the data structures to store information about guilds. Before jumping right into this, some design needs to be done to work out what data needs to be stored. Once the design has been completed the database tables will need to be created and read/write code implemented in the AGIS code to access it. A new Guild class will also need to be created.
Prerequisites:
You will need to have completed part I of this series and have access to a tool to edit your database for your Atavism Server.
Design:
A Guild will need at minimum the following:
- A name
- A guild leader/owner
- A list of members
That’s a pretty basic setup and many games will want more features such as:
- Multiple ranks, each with different permissions that users can be set to
- A guild message of the day
- A guild bank to share items between guild members
- A guild exp/level system
- And more…
For the purpose of this tutorial, only the ranks and guild message of the day will be covered as the other features can get pretty complicated. The rank system itself will now also need the different permissions listed so they can be turned on or off per rank. The permissions covered in this tutorial are:
- Invite – can invite new members
- Kick – can kick current members out of the guild
- Chat – can chat in the guild chat channel
- Promote – can promote other members up to the rank below the players rank
- Demote – can demote members who are below the players rank
- Change GMOTD – can change the guild message of the day
Step 1: Create a Guild class structure
After designing the guild data structure it’s now time to create the actual class in the AGIS project. It would take a lot of typing to write up how everything would be created, so only the core structure will be covered. The full example already exists in the atavism.agis.objects package.Guild.java file.
The class will use the following properties:
	private int guildID;
	private String guildName;
	private int factionID;
	private ArrayList<GuildRank> ranks;
	private ArrayList<GuildMember> members;
	private String motd;
	private String omotd;
These properties are mostly self-explanatory, there is the id of the guild, the name of the guild and the faction it is aligned with. There is a list of ranks and a list of members and finally a message of the day (and officer message of the day).
The Guild class contains two nested classes: GuildRank and GuildMember, as these data structures require a few more details. The GuildRank class contains:
        protected int id;
	protected int rankLevel;
	protected String rankName;
	protected ArrayList<String> permissions;
These properties are simply an ID, a level, a name and a list of permissions.
The GuildMember class contains a collection of properties that are useful to check for all guild members. They are:
	protected int id;
	protected OID oid;
	protected String name;
	protected int rank;
	protected int level;
	protected String zone;
	protected String note;
	protected int status;
The oid represents the internal server ID of the character. The name is the character’s name, and rank stands for what rank they are in the guild. The last 4 are more optional and represent the characters level, what zone they are currently in, a note that the player or higher ranked guild members can set and a flag representing the characters current status – such as whether they are online or not.
There are a lot more functions that will be added to this Guild class further down the track, but the properties are the only thing that is important at the moment so it can be set up to be written to or read from the database.
Step 2: Creating the Database structure
Now that the AGIS class is setup the database structure can be created to match. As there are three data structures in the AGIS code (Guild, GuildRank, GuildMember) the same will be done in the database, with one table created for each data structure. For this guide the tables will be created in the admin database. These could be made in another database, or as an Atavism Entity instead.
Here are the sql queries to insert the three tables:
USE admin;

CREATE TABLE `guild` (
  `id` INT NOT NULL AUTO_INCREMENT,
  `name` VARCHAR(45) NOT NULL,
  `faction` INT NOT NULL,
  `motd` VARCHAR(256) NOT NULL,
  `omotd` VARCHAR(256) NOT NULL,
  PRIMARY KEY (`id`));

CREATE TABLE `guild_rank` (
  `id` INT NOT NULL AUTO_INCREMENT,
  `guildID` INT NOT NULL,
  `rank` INT NOT NULL,
  `name` VARCHAR(45) NOT NULL,
  `permissions` VARCHAR(256) NOT NULL,
  PRIMARY KEY (`id`));

CREATE TABLE `guild_member` (
  `id` INT NOT NULL AUTO_INCREMENT,
  `guildID` INT NOT NULL,
  `memberOid` BIGINT NOT NULL,
  `name` VARCHAR(32) NULL,
  `rank` INT NULL,
  `level` INT NULL,
  `note` VARCHAR(128) NULL,
  PRIMARY KEY (`id`));
Not every variable from the GuildMember class is in the guild_member table. This is because the zone and status variables only need to exist while the player is online – they do not need to be preserved while the player or server is offline.
Note: To store the guild tables in another database, just change the USE statement to contain the name of the other database to be used.
Step 3: Setting up Class Constructors
Before adding in all the read and write functions to work with the database it will be helpful to set up the constructors and a couple other functions in the Guild.java file. These are needed to initialize all the data for the Guild class and nested classes when loading it all in from the database. Add the following empty constructor and addRank/addMember functions to your guild class:
public Guild() {
this.ranks = new ArrayList<GuildRank>();
	this.members = new ArrayList<GuildMember>();
}

public void addRank(int rankID, String rankName, int rankLevel, ArrayList<String> permissions) {
// Have to check that all previous ranks have been created, along with the new one to be added
		while (ranks.size() <= rankLevel) {
ranks.add(new GuildRank(ranks.size(), "", new ArrayList<String>()));
		}
		// Update the rank data
		GuildRank rank = ranks.get(rankLevel);
		rank.setID(rankID);
		rank.setRankName(rankName);
		rank.setPermissions(permissions);
	}

public void addMember(int memberID, OID memberOid, String name, int rank, int level, String note) {
		GuildMember member = new GuildMember();
		member.setID(memberID);
		member.setOid(memberOid);
		member.setName(name);
		member.setRank(rank);
		member.setLevel(level);
		member.setNote(note);
		members.add(member);
	}
The nested GuildRank class will want a constructor that takes a few parameters and get/set functions for all the properties. Here is how it should look:
public class GuildRank {
		protected int id;
		protected int rankLevel;
		protected String rankName;
		protected ArrayList<String> permissions;

		public GuildRank(int rankID, String rankName, ArrayList<String> permissions) {
			this.rankLevel = rankID;
			this.rankName = rankName;
			this.permissions = permissions;
		}

		public void setID(int id) { this.id = id; }
		public int getID() { return id; }

		public void setRankLevel(int rankLevel) { this.rankLevel = rankLevel; }
		public int getRankLevel() { return rankLevel; }

		public void setRankName(String rankName) { this.rankName = rankName; }
		public String getRankName() { return rankName; }

		public void setPermissions(ArrayList<String> permissions) { this.permissions = permissions; }
		public ArrayList<String> getPermissions() { return permissions; }
	}
The nested GuildMember class will need an empty constructor, and it could help to have another that takes in the players oid and rank, along with all the variable getters and setter functions:
public class GuildMember {
		protected int id;
		protected OID oid;
		protected String name;
		protected int rank;
		protected int level;
		protected String zone;
		protected String note;
		protected int status;

		public GuildMember() {
		}

		public GuildMember(OID oid, int rank) {
			this.oid = oid;
			this.name = WorldManagerClient.getObjectInfo(oid).name;
			this.rank = rank;
			this.zone = (String) EnginePlugin.getObjectProperty(oid, WorldManagerClient.NAMESPACE, "zone");
			this.note = "";
			this.status = 0;
		}

		public void setID(int id) { this.id = id; }
		public int getID() { return id; }

		public void setOid(OID oid) { this.oid = oid; }
		public OID getOid() { return oid; }

		public void setName(String name) { this.name = name; }
		public String getName() { return name; }

		public void setRank(int rank) { this.rank = rank; }
		public int getRank() { return rank; }

		public void setLevel(int level) { this.level = level; }
		public int getLevel() { return level; }

		public void setZone(String zone) { this.zone = zone; }
		public String getZone() { return zone; }

		public void setNote(String note) { this.note = note; }
		public String getNote() { return note; }

		public void setStatus(int status) { this.status = status; }
		public int getStatus() { return status; }

	}
Step 4: Reading from and Writing to the Database
With the Guild class and database tables created it is now time to implement the code to read the guild data from the database and to write to the database as well.
The files that handle the database queries are in the atavism.agis.database package, with AccountDatabase.java handling queries to the admin database (yes the name is confusing). A few new functions will need to be added to that file (or equivalent *Database.java file if using a different database to store the Guild tables) to handle reading the information about a Guild, inserting a new Guild into the database, or editing an existing one. The functions are straight forward with each performing a different database query:
public HashMap<Integer, Guild> loadGuildData() {
		HashMap<Integer, Guild> list = new HashMap<Integer, Guild>();
		PreparedStatement ps = null;
		ResultSet rs = null;
		try {
			ps = queries.prepare("SELECT * FROM guild");
			rs = queries.executeSelect(ps);
			if (rs != null) {
				while (rs.next()) {
					Guild guild = new Guild();
					guild.setGuildID(rs.getInt("id"));
					guild.setGuildName(HelperFunctions.readEncodedString(rs.getBytes("name")));
					guild.setFaction(rs.getInt("faction"));
					guild.setMOTD(HelperFunctions.readEncodedString(rs.getBytes("motd")));
					guild.setOMOTD(HelperFunctions.readEncodedString(rs.getBytes("omotd")));
					list.put(guild.getGuildID(), guild);
				}
			}
		} catch (SQLException e) {
			e.printStackTrace();
		} finally {
			queries.closeStatement(ps, rs);
		}

		// load in all guild ranks and members
		loadGuildRanks(list);
		loadGuildMembers(list);
		return list;
	}

	public void loadGuildRanks(HashMap<Integer, Guild> guilds) {
		PreparedStatement ps = null;
		ResultSet rs = null;
		try {
			ps = queries.prepare("SELECT * FROM guild_rank");
			rs = queries.executeSelect(ps);
			if (rs != null) {
				while (rs.next()) {
					int rankID = rs.getInt("id");
					int guildID = rs.getInt("guildID");
					int rank = rs.getInt("rank");
					String name = HelperFunctions.readEncodedString(rs.getBytes("name"));
					String permissionsString = HelperFunctions.readEncodedString(rs.getBytes("permissions"));
					ArrayList<String> permissions = new ArrayList<String>();
					for (String permission : permissionsString.split(",")) {
						permissions.add(permission);
					}
					guilds.get(guildID).addRank(rankID, name, rank, permissions);
				}
			}
		} catch (SQLException e) {
			e.printStackTrace();
		} finally {
			queries.closeStatement(ps, rs);
		}
	}

	public void loadGuildMembers(HashMap<Integer, Guild> guilds) {
		PreparedStatement ps = null;
		ResultSet rs = null;
		try {
			ps = queries.prepare("SELECT * FROM guild_member");
			rs = queries.executeSelect(ps);
			if (rs != null) {
				while (rs.next()) {
					int memberID = rs.getInt("id");
					int guildID = rs.getInt("guildID");
					OID memberOid = OID.fromLong(rs.getLong("memberOid"));
					String name = HelperFunctions.readEncodedString(rs.getBytes("name"));
					int rank = rs.getInt("rank");
					int level = rs.getInt("level");
					String note = HelperFunctions.readEncodedString(rs.getBytes("note"));

					guilds.get(guildID).addMember(memberID, memberOid, name, rank, level, note);
				}
			}
		} catch (SQLException e) {
			e.printStackTrace();
		} finally {
			queries.closeStatement(ps, rs);
		}
	}

	public void writeNewGuild(Guild guild) {
		Log.debug("GUILD: inserting guild:" + guild.getGuildName());
		PreparedStatement stmt = null;
		try {
			String columnNames = "name,faction,motd,omotd";
			stmt = queries.prepare("INSERT INTO guild (" + columnNames
					+ ") values (?, ?, ?, ?)");
			stmt.setString(1, guild.getGuildName());
			stmt.setInt(2, guild.getFaction());
			stmt.setString(3, guild.getMOTD());
			stmt.setString(4, guild.getOMOTD());
			guild.setGuildID(queries.executeInsert(stmt));
		} catch (SQLException e) {
			return;
		} finally {
			queries.closeStatement(stmt);
		}

		// Write guild ranks and members
		for(Guild.GuildRank rank : guild.getRanks()) {
			rank.setID(writeNewGuildRank(guild.getGuildID(), rank.getRankLevel(), rank.getRankName(), rank.getPermissions()));
		}
		for(Guild.GuildMember member : guild.getMembers()) {
			member.setID(writeNewGuildMember(guild.getGuildID(), member.getOid(), member.getName(),
					member.getRank(), member.getLevel(), member.getNote()));
		}
	}

	public int writeNewGuildRank(int guildID, int rank, String name, ArrayList<String> permissions) {
		Log.debug("GUILD: inserting guild rank: " + rank);
		PreparedStatement stmt = null;
		try {
			String columnNames = "guildID,rank,name,permissions";
			stmt = queries.prepare("INSERT INTO guild_rank (" + columnNames
					+ ") values (?, ?, ?, ?)");
			stmt.setInt(1, guildID);
			stmt.setInt(2, rank);
			stmt.setString(3, name);
			String permissionsString = "";
			for (String permission : permissions) {
				permissionsString += permission + ",";
			}
			stmt.setString(4, permissionsString);
			return queries.executeInsert(stmt);
		} catch (SQLException e) {
			return -1;
		} finally {
			queries.closeStatement(stmt);
		}
	}

	public int writeNewGuildMember(int guildID, OID memberOid, String name, int rank, int level, String note) {
		Log.debug("GUILD: inserting guild member: " + rank);
		PreparedStatement stmt = null;
		try {
			String columnNames = "guildID,memberOid,name,rank,level,note";
			stmt = queries.prepare("INSERT INTO guild_member (" + columnNames
					+ ") values (?, ?, ?, ?, ?, ?)");
			stmt.setInt(1, guildID);
			stmt.setLong(2, memberOid.toLong());
			stmt.setString(3, name);
			stmt.setInt(4, rank);
			stmt.setInt(5, level);
			stmt.setString(6, note);
			return queries.executeInsert(stmt);
		} catch (SQLException e) {
			return -1;
		} finally {
			queries.closeStatement(stmt);
		}
	}

	public int updateGuild(Guild guild) {
		Log.debug("GUILD: Updating guild data to database");
		String tableName = "guild";
		int updated;
		PreparedStatement stmt = null;
		try {
			stmt = queries.prepare("UPDATE " + tableName + " set name=?, faction=?, motd=?, "
					+ "omotd=? where id=?");
			stmt.setString(1, guild.getGuildName());
			stmt.setLong(2, guild.getFaction());
			stmt.setString(3, guild.getMOTD());
			stmt.setString(4, guild.getOMOTD());
			stmt.setInt(5, guild.getGuildID());
			Log.debug("CONTENTDB: updating guild with statement: " + stmt.toString());
			updated = queries.executeUpdate(stmt);
		} catch (SQLException e) {
			return -1;
		} finally {
			queries.closeStatement(stmt);
		}
		Log.debug("Wrote guild data to database");
		return updated;
	}

	public int updateGuildRank(int id, String name, ArrayList<String> permissions) {
		Log.debug("GUILD: Updating guild data to database");
		String tableName = "guild_rank";
		int updated;
		PreparedStatement stmt = null;
		try {
			stmt = queries.prepare("UPDATE " + tableName + " set name=?, permissions=? where id=?");
			stmt.setString(1, name);
			String permissionsString = "";
			for (String permission : permissions) {
				permissionsString += permission + ",";
			}
			stmt.setString(2, permissionsString);
			stmt.setInt(3, id);
			Log.debug("CONTENTDB: updating guild with statement: " + stmt.toString());
			updated = queries.executeUpdate(stmt);
		} catch (SQLException e) {
			return -1;
		} finally {
			queries.closeStatement(stmt);
		}
		Log.debug("Wrote guild data to database");
		return updated;
	}

	public int updateGuildMember(int id, String name, int rank, int level, String note) {
		Log.debug("GUILD: Updating guild data to database");
		String tableName = "guild_member";
		int updated;
		PreparedStatement stmt = null;
		try {
			stmt = queries.prepare("UPDATE " + tableName + " set name=?, rank=?, level=?, "
					+ "note=? where id=?");
			stmt.setString(1, name);
			stmt.setInt(2, rank);
			stmt.setInt(3, level);
			stmt.setString(4, note);
			stmt.setInt(5, id);
			Log.debug("CONTENTDB: updating guild with statement: " + stmt.toString());
			updated = queries.executeUpdate(stmt);
		} catch (SQLException e) {
			return -1;
		} finally {
			queries.closeStatement(stmt);
		}
		Log.debug("Wrote guild data to database");
		return updated;
	}

	public int deleteGuild(int guildID) {
		String tableName = "guild";
		String deleteString = "DELETE FROM `" + tableName + "` WHERE id = " + guildID;
		int deleted = queries.executeUpdate(deleteString);
		// Also delete all associated ranks and members
		tableName = "guild_rank";
		deleteString = "DELETE FROM `" + tableName + "` WHERE guildID = " + guildID;
		deleted = queries.executeUpdate(deleteString);
		tableName = "guild_member";
		deleteString = "DELETE FROM `" + tableName + "` WHERE guildID = " + guildID;
		deleted = queries.executeUpdate(deleteString);
		return deleted;
	}

	public void deleteGuildRank(int rankID) {
		String tableName = "guild_rank";
		String deleteString = "DELETE FROM `" + tableName + "` WHERE id = " + rankID;
		queries.executeUpdate(deleteString);
	}

	public void deleteGuildMember(int memberID) {
		String tableName = "guild_member";
		String deleteString = "DELETE FROM `" + tableName + "` WHERE id = " + memberID;
		queries.executeUpdate(deleteString);
	}
A lot of these will not be used yet, but by having all these functions defined now it will make implementing the rest of the features much easier.
Helpful Notes:
- The OID class is an internal Atavism id system for all objects that get saved to the atavism objstore database. When saving an OID to another database they are best stored as a BIGINT which is MySQLs version of a long. The OID.toLong() and OID.fromLong() functions will handle this.
- Loading in Strings directly from MySQL doesn’t work too nicely in Java when different encodings are used so the HelperFunctions.readEncodedString() function helps out. By loading in a MySQL string as bytes and passing it to the readEncodedString() function it will handle the encoding.
Step 5: Storing the Map of Guilds in the Plugin class
Finally, a map of the guilds that exist should be stored in the Guild Plugin so they can be easily accessed. Add the guilds HashMap to the GuildPlugin class (in the GuildPlugin.java file):
private HashMap<Integer, Guild> guilds;The Integer key will store the id of the Guild for quick reference.
It will also be helpful to store an instance of the AccountDatabase in the GuildPlugin as well. Add this line of code to the GuildPlugin class:
private AccountDatabase aDB;The last thing is to add the creation of the AccountDatabase instance and the loading of the guild data to the onActivate() function:
        aDB = new AccountDatabase();
        guilds = aDB.loadGuildData();
This means when the GuildPlugin is activated it will create a connection to the AccountDatabase and then load in all of the current Guilds.
That concludes part 2 of the Implementing the Guild System into Atavism guide. The Plugin will now be loaded when the server starts and it will now read in any Guild data when it starts, along with having the core structures in place to save Guild data as needed. The next part will look at setting up the client side of the Guild system.
Implementing a Guild System into Atavism – Part III
The third part in implementing the guild system is to create the core file in the Unity project that will manage Guild data for the client. This class will store a copy of the players’ guild information and contain functions for sending messages to the server as the user performs actions (such as sending a Guild chat message) and for receiving Guild related messages.
For this step just the basic structure of the class will be created with the rest being fleshed out in the next couple steps.
Prerequisites:
You will need to have completed part II of this series and be able to edit C# scripts that are in your Unity project.
Step 1: Create the AtavismGuild C# Script
This first step is simply creating a new C# script in Unity (ideally in the AtavismObjects/Scripts folder) and filling in a few details. Once the script has been made open it up so the text can be edited.
Add the following line below the other “using statements” if it doesn’t already exist:
using System.Collections.Generic;Next, delete the Update() function as it is not needed and will slow down Unity if it is left in. Some scripts do make use of the Update() function – which runs every frame – but this one does not.
Now add the following variables which mostly match what was added in the Guild class in the AGIS code:
string guildName;
	int factionID;
	List<AtavismGuildRank> ranks;
	List<AtavismGuildMember> members;
	string motd;
	string omotd;
The id is not needed as no client-side scripts will need the guild ID. Finally, create Property Getters for each variable like so:
public string GuildName {
		get {
			return guildName;
		}
	}
This allows other scripts to get the variable, but not change the value directly.
Step 2: Creating the Member and Rank classes
The GuildMember and GuildRank data will need to be stored on the client as well, so in the same AtavismGuild script add the following classes above or below the AtavismGuild class:
public class AtavismGuildMember {
	public OID oid;
	public string name;
	public int rank;
	public int level;
	public string zone;
	public string note;
	public int status;
}

public class AtavismGuildRank {
	public int rankLevel;
	public string rankName;
	public List<string> permissions;
}
These match the AGIS version of these classes with the exception of the id of each class missing once again as they are not needed. They could be added if there was a need for them, but currently there is not.
As the values are all public no Property Getters need to be created. The variables could be made private and Property Getters/Setters added, it’s a matter of personal preference.
Step 3: Creating a static Instance variable
Only one copy of the AtavismGuild script will ever need to exist, and it will be very helpful being able to access that one copy from other scripts such as the Guild UI so a static Instance variable will be created. The static instance variable gets set when the script loads up (in the Start() function) and a Property Getter is created allowing easy to the instance of the AtavismGuild that is running by using the following code:
AtavismGuild.InstanceThat reference code above will be used a lot in the Guild UI scripts to retrieve Guild data and call functions.
To create this static instance first add the static variable to the AtavismGuild class:
static AtavismGuild instance;Then add this line to the Start() function:
instance = this;And finally add the Property Getter:
	public static AtavismGuild Instance {
		get {
			return instance;
		}
	}
Save the AtavismGuild script and close it for now. That is all that is needed for this part III.
Step 4: Adding the component to the Scripts Prefab
The final step is to add the new AtavismGuild script as a component to the Scripts prefab, which is located in the AtavismObjects folder. Once it has been added it will be loaded up along with all other components in the Scripts prefab when the Login scene starts.
Implementing a Guild System into Atavism – Part IV
The fourth part in implementing the guild system is to create the messages between the client and server to pass information around. This will involve editing both the client and server files as both will need to send messages, and both will need to receive messages.
Prerequisites:
You will need to have completed all the previous parts of this guide.
Step 1: Creating the messages the server will send to the client
As the player join a guild, logs in, or there is an update/event that occurs in the Guild the player’s Client will need to be notified. The notification may include information about the Guild, or a chat message to be displayed in the players chat window. The first step is to work out what information needs to be sent from the server to the client, and what events will require that information to be sent.
The first obvious one is when a player logs in or joins a guild they will need the list of all members sent down, along with all other guild information such as the message of the day, the ranks and the guild name. This message will be called “sendGuildData” and contains pretty much all of the Guild information a player could need.
The second message that comes to mind is letting all other Guild members know when a player joins or leaves the Guild. The message would need to contain information only about that one member, rather than sending down the list of all members again. This message will be called “guildMemberUpdate”.
The third message will be when a Guild Rank is added, removed or updated in some way. It will contain information about the rank, and will be called “guildRankUpdate”.
The fourth message will be when the message of the day has been updated. It will send down what the new message of the day is. It will be called “guildMotd”.
The fifth and final message for the moment will be for the Guild chat system. Each time a member sends a chat message to the Guild this message will be sent containing the chat message. It will be called “guildChat”.
To make the design simple, each message will have its own function that sends it. These functions can then be called when certain events occur. The functions will all be placed in the Guild.java file and will look like:
    public void sendGuildData(OID targetOid) {
    	Map<String, Serializable> props = new HashMap<String, Serializable>();
		props.put("ext_msg_subtype", "sendGuildData");
    	props.put("guildName", guildName);
		props.put("motd", motd);
		props.put("omotd", omotd);
		props.put("numMembers", members.size());
		for (int i = 0; i < members.size(); i++) {
			GuildMember member = members.get(i);
			props.put("memberOid" + i, member.oid);
			props.put("memberName" + i, member.name);
			props.put("memberRank" + i, member.rank);
			props.put("memberLevel" + i, member.level);
			props.put("memberZone" + i, member.zone);
			props.put("memberNote" + i, member.note);
			props.put("memberStatus" + i, member.status);
		}
		props.put("numRanks", ranks.size());
		for (int i = 0; i < ranks.size(); i++) {
    		GuildRank rank = ranks.get(i);
    		//props.put("rankNum" + i, rank.rankNum);
    		props.put("rankName" + i, rank.rankName);
    		props.put("rankNumPermissions" + i, rank.permissions.size());
    		for (int j = 0; j < rank.permissions.size(); j++) {
    			props.put("rankNum" + i + "Permission" + j, rank.permissions.get(j));
    		}
		}
		Log.debug("GUILD: sending guild data message");
		TargetedExtensionMessage msg = new TargetedExtensionMessage(
				WorldManagerClient.MSG_TYPE_EXTENSION, targetOid,
				targetOid, false, props);
		Engine.getAgent().sendBroadcast(msg);
    }
This first example, for the sendGuildData message described above, takes in the OID of the player to send the Guild data to, then creates a HashMap of properties and sets the ext_msg_subtype to “sendGuildData”. This ext_msg_subtype is used in the Client scripts to catch the message and deal with it correctly – and will be covered in the next step. Carrying on, the function then adds the basic Guild properties, such as the name and motd. It then loops through all the players and ranks and adds those values. Near the bottom of the function the actual Message object is created, then it is sent using sendBroadcast(msg);
The same structure is used for nearly all messages from the Server to the Client. It starts with a HashMap to store the properties, then the ext_msg_subtype is added, along with any other properties. Then the actual TargetedExtensionMessage is created and sent off using Engine.getAgent().sendBroadcast(msg);
For reference, here is what the other message sending functions should look like:
public void sendMemberData(GuildMember updatedMember, String action) {
    	Map<String, Serializable> props = new HashMap<String, Serializable>();
		props.put("ext_msg_subtype", "guildMemberUpdate");
		props.put("action", action);
		props.put("memberOid", updatedMember.oid);
		props.put("memberName", updatedMember.name);
		props.put("memberRank", updatedMember.rank);
		props.put("memberLevel", updatedMember.level);
		props.put("memberZone", updatedMember.zone);
		props.put("memberNote", updatedMember.note);
		props.put("memberStatus", updatedMember.status);

		// Any Rank changes will need to be sent to all members of the Guild
		for (GuildMember member : members) {
			// Only send the message if the member is online
			if (member.status > 0) {
				TargetedExtensionMessage msg = new TargetedExtensionMessage(
						WorldManagerClient.MSG_TYPE_EXTENSION, member.oid,
						member.oid, false, props);
				Engine.getAgent().sendBroadcast(msg);
			}
		}
    }

    public void sendRankData() {
    	Map<String, Serializable> props = new HashMap<String, Serializable>();
		props.put("ext_msg_subtype", "guildRankUpdate");
		// Easier just to send all ranks, it will never be much data
		props.put("numRanks", ranks.size());
		for (int i = 0; i < ranks.size(); i++) {
    		GuildRank rank = ranks.get(i);
    		props.put("rankName" + i, rank.rankName);
    		props.put("rankNumPermissions" + i, rank.permissions.size());
    		for (int j = 0; j < rank.permissions.size(); j++) {
    			props.put("rankNum" + i + "Permission" + j, rank.permissions.get(j));
    		}
		}

		// Any Rank changes will need to be sent to all members of the Guild
		for (GuildMember member : members) {
			// Only send the message if the member is online
			if (member.status > 0) {
				TargetedExtensionMessage msg = new TargetedExtensionMessage(
						WorldManagerClient.MSG_TYPE_EXTENSION, member.oid,
						member.oid, false, props);
				Engine.getAgent().sendBroadcast(msg);
			}
		}
    }

    public void sendMOTD() {
    	Map<String, Serializable> props = new HashMap<String, Serializable>();
		props.put("ext_msg_subtype", "guildMotd");

		// Any Rank changes will need to be sent to all members of the Guild
		for (GuildMember member : members) {
			// Only send the message if the member is online
			if (member.status > 0) {
				TargetedExtensionMessage msg = new TargetedExtensionMessage(
						WorldManagerClient.MSG_TYPE_EXTENSION, member.oid,
						member.oid, false, props);
				Engine.getAgent().sendBroadcast(msg);
			}
		}
    }

    public void sendGuildChat(OID senderOid, String message) {
    	Map<String, Serializable> props = new HashMap<String, Serializable>();
		props.put("ext_msg_subtype", "guildChat");
		props.put("sender", senderOid);
		props.put("message", message);

		// Any Rank changes will need to be sent to all members of the Guild
		for (GuildMember member : members) {
			// Only send the message if the member is online
			if (member.status > 0) {
				TargetedExtensionMessage msg = new TargetedExtensionMessage(
						WorldManagerClient.MSG_TYPE_EXTENSION, member.oid,
						member.oid, false, props);
				Engine.getAgent().sendBroadcast(msg);
			}
		}
    }
One thing that should jump out in these functions is that they all have a for loop going through each member, checking if they are online, then the message is sent to them. This is done as each of those messages will generally be sent to all members as all members will need to know the updated data or latest chat message.
Step 2: Creating the Message Handlers in the AtavismGuild class
Once the messages to be sent from the Server have been created the handlers on the Client need to be sorted out. A handler is a function defined in the C# scripts in Unity which will be passed all the properties from the message and do stuff with it. The handler function must take in a Dictionary<string, object> parameter.
After a handler has been created, it must be registered, usually in the Start() function of the class so the Atavism system knows what handler function to run when a specific ext_msg_subtype is received.
The best way to understand it is to look at some examples. Here is the handler for the “sendGuildData” ext_msg_subtype:
public void HandleGuildData(Dictionary<string, object> props) {
		members = new List<AtavismGuildMember>();
		ranks = new List<AtavismGuildRank>();

		guildName = (string)props["guildName"];
		motd = (string)props["motd"];
		omotd = (string)props["omotd"];

		int numMembers = (int)props["numMembers"];
		for (int i = 0; i < numMembers; i++) {
			AtavismGuildMember member = new AtavismGuildMember();
			member.oid = (OID)props["memberOid" + i];
			member.name = (string)props["memberName" + i];
			member.rank = (int)props["memberRank" + i];
			member.level = (int)props["memberLevel" + i];
			member.zone = (string)props["memberZone" + i];
			member.note = (string)props["memberNote" + i];
			member.status = (int)props["memberStatus" + i];
			members.Add(member);
		}

		int numRanks = (int)props["numRanks"];
		for (int i = 0; i < numRanks; i++) {
			AtavismGuildRank rank = new AtavismGuildRank();
			rank.rankName = (string)props["rankName" + i];
			rank.permissions = new List<string>();
			int rankNumPermissions = (int)props["rankNumPermissions" + i];
			for (int j = 0; j < rankNumPermissions; j++) {
				string permission = (string)props["rankNum" + i + "Permission" + j];
				rank.permissions.Add(permission);
			}
			ranks.Add(rank);
		}

		// dispatch a ui event to tell the rest of the system
		string[] event_args = new string[1];
		AtavismEventSystem.DispatchEvent("GUILD_UPDATE", event_args);
	}
This handler first creates new List instances for the members and ranks variables (which were created in Part III of this guide) then sets the guildName and motd/omotd from the properties saved into the message.
SUPER IMPORTANT!!!
Note that the Dictionary keys match the HashMap keys made in step 1. When a property is added to an extension message being sent from the Server, the key given then is the key used to get the property out when handling it on the Client.
The handler then gets the number of members that are in this message and iterates through all the properties, created new AtavismGuildMember objects for each member that was added to the message. The same is done for the ranks, then an AtavismEventSystem Event is dispatched, to let other parts of the Client know that data has been updated. This will be covered more in the next part of this guide.
That covers the message handler, but what about the registering of this handler. It will look like:
NetworkAPI.RegisterExtensionMessageHandler("sendGuildData", HandleGuildData);With the first parameter being the ext_msg_subtype that was set in the previous step, and the second parameter being the name of the handler function. As mentioned above, simply add this line to the Start() function of the AtavismGuild class.
Here is what the other handlers look like for the other messages created above:
public void HandleMemberUpdate(Dictionary<string, object> props) {
		OID memberOid = (OID)props["memberOid"];
		string action = (string)props["action"];

		ClientAPI.Write("Got Member update with action: " + action);

		AtavismGuildMember member;
		if (action == "Remove") {
			member = GetGuildMemberByOid(memberOid);
			if (member != null) {
				members.Remove(member);
			}
			// dispatch a ui event to tell the rest of the system
			string[] event_args = new string[1];
			AtavismEventSystem.DispatchEvent("GUILD_UPDATE", event_args);
			return;
		}

		if (action == "Update") {
			member = GetGuildMemberByOid(memberOid);
		} else {
			member = new AtavismGuildMember();
			members.Add(member);
		}
		member.oid = (OID)props["memberOid"];
		member.name = (string)props["memberName"];
		member.rank = (int)props["memberRank"];
		member.level = (int)props["memberLevel"];
		member.zone = (string)props["memberZone"];
		member.note = (string)props["memberNote"];
		member.status = (int)props["memberStatus"];

		// dispatch a ui event to tell the rest of the system
		string[] args = new string[1];
		AtavismEventSystem.DispatchEvent("GUILD_UPDATE", args);
	}

	public void HandleRankUpdate(Dictionary<string, object> props) {
		OID memberOid = (OID)props["memberOid"];
		string action = (string)props["action"];

		// dispatch a ui event to tell the rest of the system
		string[] args = new string[1];
		AtavismEventSystem.DispatchEvent("GUILD_UPDATE", args);
	}

	public void HandleGuildMotd(Dictionary<string, object> props) {
		OID memberOid = (OID)props["memberOid"];
		string action = (string)props["action"];

		// dispatch a ui event to tell the rest of the system
		string[] args = new string[1];
		AtavismEventSystem.DispatchEvent("GUILD_UPDATE", args);
	}

	public void HandleGuildChat(Dictionary<string, object> props) {
		OID memberOid = (OID)props["memberOid"];
		string action = (string)props["action"];

		// dispatch a ui event to tell the rest of the system
		string[] args = new string[1];
		AtavismEventSystem.DispatchEvent("GUILD_UPDATE", args);
	}
And the other handler register calls that get added to the Start() function:
NetworkAPI.RegisterExtensionMessageHandler("guildMemberUpdate", HandleMemberUpdate);
		NetworkAPI.RegisterExtensionMessageHandler("guildRankUpdate", HandleRankUpdate);
		NetworkAPI.RegisterExtensionMessageHandler("guildMotd", HandleGuildMotd);
		NetworkAPI.RegisterExtensionMessageHandler("guildChat", HandleGuildChat);
With the messages now able to be sent from the Server and caught/handled by the client, the Server->Client messaging is done. More code will need to be added to tell the server when to send the message, but that will be dealt with later. It’s time to handle Client->Server messages.
Step 3: Sending messages from the Client to the Server
With the Server->Client messages ready to go, it is now time to create the messages from the Client to the Server. These will be for when players perform actions in the game that affect the Guild system. The following messages to be sent from the client will need to be created:
The first message will be when a player wants to create a Guild. This will contain the name of the Guild the player wishes to use.
The second message will be for a players response to a Guild invite. It will contain the OID of the player who sent the request, along with a Boolean representing whether the invitee said yes.
The third message will be a generic Guild Command message, which can contain any of the standard Guild commands such as quitting, inviting, promoting, demoting, changing a rank. These are all bundled up into the same message to save time.
Creating messages to go from the client to the server first require setting up a MessageType in the *Client file for the Plugin (in the AGIS code). Open the GuildPlugin.java file and add the following near the bottom of the class:
	public static final MessageType MSG_TYPE_CREATE_GUILD = MessageType.intern("guild.createGuild");
	public static final MessageType MSG_TYPE_INVITE_RESPONSE = MessageType.intern("guild.inviteResponse");
	public static final MessageType MSG_TYPE_GUILD_COMMAND = MessageType.intern("guild.guildCommand");
There is one for each of the messages mentioned above. They can be called anything, but it is best to go with a name that relates to what the MessageType is for. With the MessageTypes defined, the functions to send the messages can be created in the AtavismGuild.cs file (in Unity). The code for these are:
public void CreateGuild(string guildName) {
		Dictionary<string, object> props = new Dictionary<string, object>();
		props.Add("guildName", guildName);
		NetworkAPI.SendExtensionMessage(ClientAPI.GetPlayerOid(), false, "guild.createGuild", props);
	}

public void RespondToGuildInvitation(OID inviter, bool response) {
		Dictionary<string, object> props = new Dictionary<string, object>();
		props.Add("inviter", inviter);
		props.Add("response", response);
		NetworkAPI.SendExtensionMessage(ClientAPI.GetPlayerOid(), false, "guild.inviteResponse", props);
	}

	public void SendGuildCommand(string commandType, OID targetOid, string data) {
		Dictionary<string, object> props = new Dictionary<string, object>();
		props.Add("commandType", commandType);
		props.Add("targetOid", targetOid);
		props.Add("data", data);
		NetworkAPI.SendExtensionMessage(ClientAPI.GetPlayerOid(), false, "guild.guildCommand", props);
	}
As seen in these functions, the SendExtensionMessage() function sends the message to the Server. The parameters are the OID of the player sending the message (so almost always use ClientAPI.GetPlayerOid()), whether or not it is client targeted (always set to false), a string of the MessageType for the message (which should match the MessageType.intern()) on the server for the message, and finally a Dictionary of properties that will be sent with the message.
The MessageType string tells the server what kind of message it is, so when the server receives the message it will know what to do with it. The server handling of the message will be covered in the next Step.
These functions can just sit there for now. It won’t be until the UI is created in part V of this guide series that they will be called.
Step 4: Handling messages from the Client on the Server
With the messages now ready to be sent from the Client, Hooks need to be created in the GuildPlugin.java file to pick up the messages and process them appropriately. Filters also need to be created to tell the plugin what messages to listen for, and all MessageTypes must be listed in worldmessages.py in the config/world folder. The intern of the MessageTypes will need to be added to the –ads.txt config files and finally, for ExtensionMessages from the client the Proxy Plugin also needs to be told what MessageTypes are valid. It’s a bit of work, but it’s all to ensure correct data and to optimize the system so only the Plugins that want to deal with certain messages receive them.
So help explain the flow, and why, here are the 5 parts:
- Adding the MessageTypeTranslation to the worldmessages.py file in the config/world folder. This is done so the message system knows about the MessageType when it loads up (as it is a separate process).
- Add the proxyPlugin.registerExtensionSubType to the extensions_proxy.py file in the config/world folder. This is so the Proxy Plugin will know what MessageType to convert incoming messages to, and that they are valid.
- Add the MessageType intern to the matching –ads.txt file for the relevant Plugin.
- Add the MessageType to the MessageFilter to the onActivate() function in the *Plugin.java file. This tells the message system that the Plugin is listening for messages with the specific MessageType.
- Register a Hook class to the specific MessageType so the Plugin knows what Hook class to run when a message with that MessageType is received.
With all that in mind, here is what needs to be done:
Open worldmessages.py (in the config/world folder) and add at the bottom:
MessageCatalog.addMsgTypeTranslation(aoMessageCatalog, GuildClient.MSG_TYPE_CREATE_GUILD)
MessageCatalog.addMsgTypeTranslation(aoMessageCatalog, GuildClient.MSG_TYPE_INVITE_RESPONSE)
MessageCatalog.addMsgTypeTranslation(aoMessageCatalog, GuildClient.MSG_TYPE_GUILD_COMMAND)
These are just the MessageTypes from the GuildClient file created in Step 3.
Next open extensions_proxy.py and add the following at the bottom:
proxyPlugin.registerExtensionSubtype("guild.createGuild", GuildClient.MSG_TYPE_CREATE_GUILD)
proxyPlugin.registerExtensionSubtype("guild.inviteResponse", GuildClient.MSG_TYPE_INVITE_RESPONSE)
proxyPlugin.registerExtensionSubtype("guild.guildCommand", GuildClient.MSG_TYPE_GUILD_COMMAND)
These are pretty much a reverse lookup of the MessageTypes created in Step 3. The intern string now goes first, with the MessageType listed second.
Now open up proxy-ads.txt and add:
guild.createGuild
guild.guildCommand
guild.inviteResponse
These are the intern strings from the MessageTypes and are added so the message system knows that the proxy plugin sends out these messages (as the proxy server gets the messages from the Client, then forwards them on to the rest of the server – or in this case, the GuildPlugin).
With the python files sorted out, the next step is to add a MessageFilter to the GuildPlugin. After the filter is created, MessageTypes are added to it, then the subscription to the message system is created using the filter. The code, added to the onActivate() function will look like:
MessageTypeFilter filter = new MessageTypeFilter();
filter.addType(GuildClient.MSG_TYPE_CREATE_GUILD);
filter.addType(GuildClient.MSG_TYPE_INVITE_RESPONSE);
filter.addType(GuildClient.MSG_TYPE_GUILD_COMMAND);
Engine.getAgent().createSubscription(filter, this);
Note that more MessageTypes will be added to the filter in later steps.
After the filters have been created the Hook class will need to be created for each MessageType. The skeleton version of these files will look like:
class GuildCreateHook implements Hook {
		public boolean processMessage(Message msg, int flags) {
			ExtensionMessage gmMsg = (ExtensionMessage) msg;
			return true;
		}
	}

	class GuildInviteResponseHook implements Hook {
		public boolean processMessage(Message msg, int flags) {
			ExtensionMessage gmMsg = (ExtensionMessage) msg;
			return true;
		}
	}
	class GuildCommandHook implements Hook {
		public boolean processMessage(Message msg, int flags) {
			ExtensionMessage gmMsg = (ExtensionMessage) msg;
			return true;
		}
	}
The logic for these Hook classes will be added in the next step. The classes are just being created now, so the final section of this step can be done.
Finally, the registering of these Hook classes can be done in the registerHooks() function. The code will look like:
	protected void registerHooks() {
		getHookManager().addHook(GuildClient.MSG_TYPE_CREATE_GUILD,
				new GuildCreateHook());
		getHookManager().addHook(GuildClient.MSG_TYPE_INVITE_RESPONSE,
				new GuildInviteResponseHook());
		getHookManager().addHook(GuildClient.MSG_TYPE_GUILD_COMMAND,
				new GuildCommandHook());
	}
The process is simply calling addHook() with the MessageType as the first parameter, then the Hook class to run as the second parameter. Note that more hooks will be added to the registerHooks() function in later steps.
And that is the very basics of sending a message from the Client and having it picked up by the server. The last thing to do now is to add logic to the Hook classes so when the messages are received, things are done.
Step 5: Putting it all together – Creating a Guild
A lot of work has been done to set up the Guild classes on the Server, the Client and in the Database, and then to create the messages/handlers to allow data to be sent back and forth, but it still isn’t all linked up, and all this code currently does nothing. This step covers putting it all together to make the process of Creating a Guild work and then sending down the data to the player who created the Guild.
For this guide, the simplest way of creating a Guild is going to be used: typing “/createGuild <guildName>” into the chatbox. Additional parts to the guide may be added later on explaining how to add other Guild creation options.
The process of implementing this will be done in the order of the code progression.
The first part is handling the /createGuild command. Slash-Commands can be handled on either the Client or the Server, depending on what best suits. For this scenario, it will be handled on the Client. Open up the StandardCommands.cs file and add the following function:
public void HandleCreateGuild(string args_str) {
	AtavismGuild.Instance.CreateGuild(args_str);
}
This function calls the CreateGuild() function created in Step 3, and passes a string – everything after the /createGuild command. In the Start() function of StandardCommands, add the register call for the /createGuild command:
AtavismCommand.RegisterCommandHandler("createGuild", HandleCreateGuild);This means when a player types “/createGuild” it will run the HandleCreateGuild() function – and as just created above, the HandleCreateGuild() function will call the CreateGuild() function in the AtavismGuild class. The CreateGuild() function sends off the guild.createGuild message to the server and the registerHooks() function in the GuildPlugin.java tells it to run the GuildCreateHook class when it gets the guild.createGuild message.
Currently, the GuildCreateHook is just a shell though and doesn’t really do anything. The next step is to now fill it with logic.
When the message is received in the GuildCreateHook it will run the processMessage() function. Currently ,the function just has two lines:
ExtensionMessage gmMsg = (ExtensionMessage) msg;
return true;
The new logic will go between these two.
So, what needs to be done? The very first two things that are recommended to do when processing a message is to get the OID of the sender and to also write a log message to indicate the message got received (great for debugging). Add these two lines:
OID oid = gmMsg.getSubject();
Log.debug("GUILD: got create guild message from player: " + oid);
Next, the function should check to make sure the players character can create a Guild – as in, that they aren’t already in a Guild. That in itself is a nice little tricky one to work out – how does the server know if the character is in a Guild – and also – what Guild? As each Guild gets saved to the Database and assigned an ID, it would make sense to save the ID of the Guild as a property on the character.
As each property saved to a character needs a name (which is a String), it can make life easy to define the property name just once as a public, static, final variable. Add the following line to the bottom of the GuildPlugin (still inside the class):
public static final String GUILD_PROP = "guild";Going back to the GuildCreateHook class, the following code can be used to get the ID of the Guild the character is currently in:
int guildID = -1;
	try {
		guildID = (Integer) EnginePlugin.getObjectProperty(oid, WorldManagerClient.NAMESPACE, GUILD_PROP);
	} catch (NullPointerException e1) {
}
The try/catch block is needed as the character may not have a Guild ID yet, so the value may be null. The WorldManagerClient.NAMESPACE is used as the Guild property does not really belong to any other process (that is a whole different story not to be covered here).
A check can now be run on the character’s guildID to see if it is greater than 0 – as that means they are currently in a Guild. This code here simply does a check and will send a message to the players chatbox if they are already in a Guild:
if (guildID > 0) {
	Log.warn("GUILD: player attempted to create a guild, but is already currently in a guild");
	WorldManagerClient.sendObjChatMsg(oid, 1, "You cannot create a guild while you are in a guild");
	return true;
}
It returns from the function (always return true when working with Hooks) so that no other code from this Hook will run.
If the character is not in a Guild it is time to proceed with the next step: getting the name they want to use. Any properties sent in a message from the client can be retrieved by the getProperty(“propertyName”) function. In Step 3 a property called “guildName” was added to the createGuild message, so that will be retrieved using:
String guildName = (String) gmMsg.getProperty("guildName");It will need cast back to String as when it is sent as a message all properties get converted to Serializable. Once the guildName has been retrieved a check needs to be done to make sure no other Guilds exist with that name. The way to do this is to loop through every Guild and check if the name equals this given name:
for (Guild guild : guilds.values()) {
	if (guild.getGuildName().equals(guildName)) {
		WorldManagerClient.sendObjChatMsg(oid, 1, "The guild "
		+ guildName + " already exists. Please choose another name.");
		return true;
	}
}
If an existing Guild is found that uses the same name, it sends a message to the players chatbox and then returns true again to stop the rest of the code running.
With all the required checks done, it is almost time to create the Guild object. Just before that can be done, there are two things that need to be set up: the default Rank Names and the permissions they start with. Ideally, they should be read in from a Database where the developer can set them, but to save time for this guide, they will be hard-coded into the GuildPlugin.
At the bottom of the GuildPlugin.java file, but still inside the class, the following should be added:
public static final String PERMISSION_INVITE = "invite";
public static final String PERMISSION_KICK = "kick";
public static final String PERMISSION_PROMOTE = "promote";
public static final String PERMISSION_DEMOTE = "demote";
public static final String PERMISSION_SET_MOTD = "setmotd";
public static final String PERMISSION_CHAT = "chat";

public static ArrayList<String> rankNames = new ArrayList<String>();
public static ArrayList<ArrayList<String>> defaultPermissions = new ArrayList<ArrayList<String>>();
These are a bunch of predefined strings for permissions, then an empty list of rankNames and the default permissions.
Now add to the end of the onActivate() function this code to full the lists:
rankNames.add("Guild Master");
ArrayList<String> gmPermissions = new ArrayList<String>();
gmPermissions.add(PERMISSION_INVITE);
gmPermissions.add(PERMISSION_KICK);
gmPermissions.add(PERMISSION_PROMOTE);
gmPermissions.add(PERMISSION_DEMOTE);
gmPermissions.add(PERMISSION_SET_MOTD);
gmPermissions.add(PERMISSION_CHAT);
defaultPermissions.add(gmPermissions);

rankNames.add("Officer");
ArrayList<String> officerPermissions = new ArrayList<String>();
officerPermissions.add(PERMISSION_INVITE);
officerPermissions.add(PERMISSION_KICK);
officerPermissions.add(PERMISSION_PROMOTE);
officerPermissions.add(PERMISSION_DEMOTE);
officerPermissions.add(PERMISSION_CHAT);
defaultPermissions.add(officerPermissions);

rankNames.add("Peasant");
ArrayList<String> peasantPermissions = new ArrayList<String>();
peasantPermissions.add(PERMISSION_CHAT);
defaultPermissions.add(peasantPermissions);
With those lists now set, return to the GuildCreateHook and add this code below the name check to create the Guild object:
ArrayList<OID> initiates = new ArrayList<OID>();
int factionID = (Integer)EnginePlugin.getObjectProperty(oid, Namespace.FACTION, FactionStateInfo.FACTION_PROP);
Guild newGuild = new Guild(-1, guildName, factionID, rankNames, defaultPermissions, oid, initiates);
The first line contains a list of initiates, as in people who are going to join the Guild right as it gets created. It doesn’t get filled yet, but could be later on. The next line gets the characters Faction so the Guild can be aligned with that Faction, and will later on prevent players from enemy Factions joining it. The last line actually creates the Guild, passing in several parameters which will be handled soon.
With the Guild object created it can now be saved to the Database using this code:
aDB.writeNewGuild(newGuild);It makes sense to run a quick check to ensure the Guild was saved to the Database by checking if the GuildID is not -1.
if (newGuild.getGuildID() == -1) {
	// Something went wrong on the insert
	WorldManagerClient.sendObjChatMsg(oid, 1, "Something went wrong");
	return true;
}
The final few lines of code then put the Guild into the guilds map and save the Guild ID and Name to the characters properties:
guilds.put(newGuild.getGuildID(), newGuild);

EnginePlugin.setObjectProperty(oid, WorldManagerClient.NAMESPACE, GUILD_PROP, newGuild.getGuildID());
EnginePlugin.setObjectProperty(oid, WorldManagerClient.NAMESPACE, GUILD_NAME_PROP, newGuild.getGuildName());

After these few last lines of code the “return true;” line should finish up the function. That is the GuildCreateHook completed. For reference, here is the completed Hook:

	class GuildCreateHook implements Hook {
		public boolean processMessage(Message msg, int flags) {
			ExtensionMessage gmMsg = (ExtensionMessage) msg;
			OID oid = gmMsg.getSubject();

			Log.debug("GUILD: got create guild message from player: " + oid);

			// First make sure the player isn't already in a guild
			int guildID = -1;
			try {
				guildID = (Integer) EnginePlugin.getObjectProperty(oid, WorldManagerClient.NAMESPACE, GUILD_PROP);
			} catch (NullPointerException e1) {
			}

			if (guildID > 0) {
				Log.warn("GUILD: player attempted to create a guild, but is already currently in a guild");
				WorldManagerClient.sendObjChatMsg(oid, 1, "You cannot create a guild while you are in a guild");
				return true;
			}

			String guildName = (String) gmMsg.getProperty("guildName");
			// Check if the guild name is already used
			for (Guild guild : guilds.values()) {
				if (guild.getGuildName().equals(guildName)) {
					WorldManagerClient.sendObjChatMsg(oid, 1, "The guild "
							+ guildName + " already exists. Please choose another name.");
					return true;
				}
			}

			ArrayList<OID> initiates = new ArrayList<OID>();
			int factionID = (Integer)EnginePlugin.getObjectProperty(oid, Namespace.FACTION, FactionStateInfo.FACTION_PROP);
			Guild newGuild = new Guild(-1, guildName, factionID, rankNames,
					defaultPermissions, oid, initiates);

			aDB.writeNewGuild(newGuild);
			newGuild.setAccountDatabase(aDB);
			if (newGuild.getGuildID() == -1) {
				// Something went wrong on the insert
				WorldManagerClient.sendObjChatMsg(oid, 1, "Something went wrong");
				return true;
			}
			guilds.put(newGuild.getGuildID(), newGuild);

			EnginePlugin.setObjectProperty(oid, WorldManagerClient.NAMESPACE, GUILD_PROP, newGuild.getGuildID());
			EnginePlugin.setObjectProperty(oid, WorldManagerClient.NAMESPACE, GUILD_NAME_PROP, newGuild.getGuildName());

			return true;
		}
	}
An error is likely coming up on the line that creates the Guild object though. This is because a new constructor for the Guild class will need to be created. Open up the Guild.java file and create a new constructor that will look like:
public Guild(int guildID, String guildName, int factionID, ArrayList<String> rankNames,
			ArrayList<ArrayList<String>> rankPermissions, OID leaderOid, ArrayList<OID> initiates) {
		this.guildID = guildID;
		this.guildName = guildName;
		this.factionID = factionID;
		this.ranks = new ArrayList<GuildRank>();
		for (int i = 0; i < rankNames.size(); i++) {
			GuildRank newRank = new GuildRank(i, rankNames.get(i), rankPermissions.get(i));
			ranks.add(newRank);
		}
		this.members = new ArrayList<GuildMember>();
		GuildMember leader = new GuildMember(leaderOid, 0);
		members.add(leader);
		for (int i = 0; i < initiates.size(); i++) {
			GuildMember initiate = new GuildMember(initiates.get(i), ranks.size()-1);
			members.add(initiate);
		}
		this.motd = "Welcome to the guild.";
		this.omotd = "Welcome to the guild.";

		// Send down guild info to each member
		for (GuildMember member : members) {
			sendGuildData(member.oid);
		}
	}
Which takes in the parameters that were given in the Hook above and sets the name, faction, ranks, and leader of the Guild. It also sends down the guildData to all members (the leader and any initiates who were joining as well).
After all that work now a player can create a Guild! Still, not much can be done with the Guild yet though and there are plenty of other events that need to be handled to make the Guilds a functioning system.
Here is what still needs to be added to get this to a basic level of functionality:
- Handling when a player logs into the game so the guildData can be sent down to them
- Creating a Guild UI so players can see a list of Guild Members and perform actions
- Inviting a player to join the Guild and handling the response of the invitee
- Handling basic commands such as promote, demote, quit
- Disbanding a Guild
And possibly a few more things as well.
The first event listed above will be covered below, then the rest will be covered in part V of this guide series as it covers a whole new topic of UI creation.
Step 6: Handling Player Login
When a player logs into the game they will need their Guild information sent down to them so they can view it if they wish. There are two existing messages get sent to the server plugins that can be used for this. One is the LoginMessage which gets sent as soon as a player has logged into the world, and the second is the SpawnedMessage which gets sent whenever an object is spawned.
For situations like this where an ExtensionMessage will be sent to the Client (with the guildData) the LoginMessage can’t be used as the Client will not be ready yet to handle the ExtensionMessage. The SpawnedMessage gets sent slightly later and will work.
Add the following Hook to the GuildPlugin.java file, inside the GuildPlugin class:
class SpawnedHook implements Hook {
		public boolean processMessage(Message msg, int flags) {
			WorldManagerClient.SpawnedMessage spawnedMsg = (WorldManagerClient.SpawnedMessage) msg;
			OID objOid = spawnedMsg.getSubject();

			// Do something
			int guildID = -1;
			try {
				guildID = (Integer) EnginePlugin.getObjectProperty(objOid, WorldManagerClient.NAMESPACE, GUILD_PROP);
			} catch (NullPointerException e1) {
			}

			Log.debug("GUILD: got guildID: " + guildID);

			if (guilds.containsKey(guildID)) {
				guilds.get(guildID).memberLoggedIn(objOid);
			}

			return true;
		}
	}
It gets the OID of the object that spawned and then tries to get the Guild ID of the object (similar to the code used in the GuiildCreateHook). If a Guild exists with that ID it then calls the memberLoggedIn() function. Just before that function is created, the filter and Hook registration needs to be done for this Hook.
Even before that though, it makes sense to handle when a player LoggedOut as well, so other Guild members can be notified. Add this Hook to the GuildPlugin class:
class LogoutHook implements Hook {
		public boolean processMessage(Message msg, int flags) {
			LogoutMessage message = (LogoutMessage) msg;
			OID playerOid = message.getSubject();
			Log.debug("LOGOUT: guild logout started for: " + playerOid);
			// Do something
			int guildID = -1;
			try {
				guildID = (Integer) EnginePlugin.getObjectProperty(playerOid, WorldManagerClient.NAMESPACE, GUILD_PROP);
			} catch (NullPointerException e1) {
			}

			if (guilds.containsKey(guildID)) {
				guilds.get(guildID).memberLoggedOut(playerOid);
			}

			Engine.getAgent().sendResponse(new ResponseMessage(message));
			Log.debug("LOGOUT: guild logout finished for: " + playerOid);
			return true;
		}
	}
The LogoutHook does pretty much the same thing as the SpawnedHook. It gets the OID of the character logging out and gets the Guild ID of the character. If a Guild exists with that ID it calls the memberLoggedOut() function. There is a new line of code here that sends a ResponseMessage. It can be ignored for now, but it needs to be left there.
With both Hooks created, add these two MessageTypes to the filter in the onActivate() function:
filter.addType(WorldManagerClient.MSG_TYPE_SPAWNED);
filter.addType(LogoutMessage.MSG_TYPE_LOGOUT);
Remember to put these before the createSubscription() call. Now add the two Hooks to the registerHooks() function:
getHookManager().addHook(WorldManagerClient.MSG_TYPE_SPAWNED,new SpawnedHook());
getHookManager().addHook(LogoutMessage.MSG_TYPE_LOGOUT,new LogoutHook());
And that is all that needed for those two Hooks to work. Now head into the Guild.java file so the two new memberLoggedIn() and memberLoggedOut() functions can be added. The two functions will look like:
public void memberLoggedIn(OID memberOid) {
		GuildMember member = getGuildMember(memberOid);
		if (member == null || member.status != 0) {
			return;
		}
		Log.debug("GUILD: got member Logged in: " + memberOid);
		member.status = 1;
		sendGuildData(memberOid);

		// Send message to all other members that this player is now online
		sendMemberData(member, "Update");
	}

	public void memberLoggedOut(OID memberOid) {
		GuildMember member = getGuildMember(memberOid);
		if (member == null) {
			return;
		}

		member.status = 0;
		// Send message to all other members that this player is now offline
		sendMemberData(member, "Update");
	}
They simply make sure the character is actually a member of the Guild, then for the memberLoggedIn() function it sends down the guildData to them, and in both functions it lets all other members know they logged in or out.
That concludes part IV of this guide series. The next step will cover the creation of the UI and completing the code for handling some of the commands.
Implementing a Guild System into Atavism – Part V
The fifth part in implementing the guild system is to create the User Interface for the Guild system and complete the code for the commands that can be sent from it. The last part covered creating a Guild and sending down the data about it when a player logged in, so now it’s time to show it.
Prerequisites:
You will need to have completed part IV of this series and be able to edit C# scripts that are in your Unity project. You will also need basic Unity skills for creating GameObjects, changing values in the Inspector, dragging prefabs etc.
Step 1: Designing the User Interface
Before making an UI or writing any code a basic design needs to be worked out. The main panel will need the following:
- The Guild Name
- The message of the day
- A list of Guild Members with details such as Name, rank, level
- A few buttons for actions such as Inviting a new member, editing Guild Ranks
Three of those items are simple, but the list of Guild Members is a bit trickier. The list may contain a hundred or even more members so it will either need to have a scroll bar or have the ability to have “pages” that players can switch between (like the Merchant UI). The scroll bar seems like the more user friendly option here so that will be used.
A mock drawing of the UI:
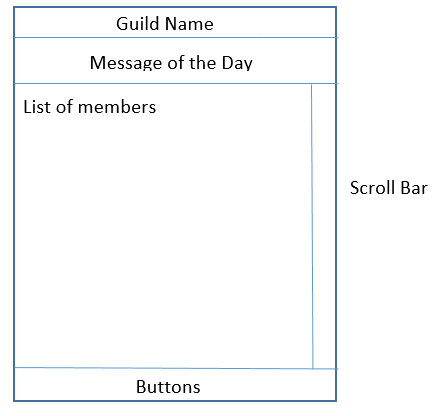
Step 2: Making the Guild Window using UGUI
Now for the fun part, the actual making of the UGUI. This will, of course, be done in Unity and in one of the in-game scenes (such as MainWorld).
Select the Canvas object, right click on it and choose “UI” -> “Panel” from the popup menu. It will create a new object called “Panel” as a child of Canvas. Rename it to “GuildPanel”.
The panel will now need to be resized as it currently covers the whole screen. With GuildPanel selected, click on the Anchor Presets icon in the Rect Transform component:
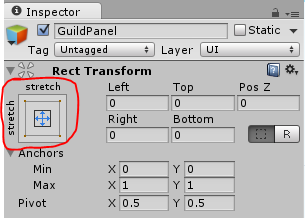
A decision has to be made as to where the Panel sits in the UI. For this guide, it will be anchored to the left side of the screen. With the Anchor Presets popup open, hold down the Alt and Shift keys and click on Middle-Left:
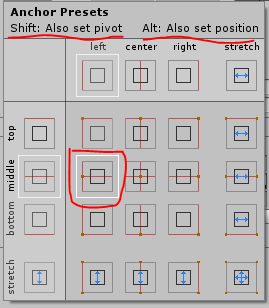
With the Anchor set, change the Width and Height to something more reasonable. Currently, most panels in the default Atavism UI use a Width of around 300 and a Height of 400 so that will also be used.
The Alpha for the panel is currently set to roughly 0.4 so that can be changed up to 1 for an opaque panel by clicking on the Color property of the Image component.
The background panel is now set – it’s time to add in the Title Bar at the top which will show the Guild Name. A TitlePanel prefab has been created to quickly add that functionality to new panels. Go into the AtavismObjects/Scripts/UGUI/UI Prefabs folder and drag the TitlePanel prefab onto the GuildPanel. The word “Text” will show up at the top of the Panel along with a close button (indicated by the letter “X”. The code will be added later on to make the Text change to show the players Guild Name.
Note: The Text object in the TitlePanel could be changed to display the name of the Panel if it was going to be static, but as it will be automatically changed to show the Guild Name via code, it will be left along
The next step is to create the Panel and Text object for the Message of the Day. Right click on the Guild Panel and choose UI -> Panel. Rename the new Panel to “MotdPanel”. Open up the Anchor Presets window and, while holding Alt and Shift, click on Top-Center. Then set the Width to 300 and the Height to 60. The Panel will want to be moved down slightly, so the Pos Y will be set to roughly -20:
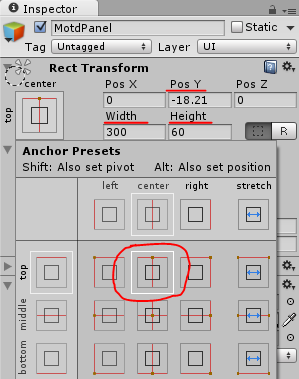
With the Panel for the Motd made, right click on MotdPanel and choose UI -> Text. Once again the text in the Text object won’t need to be changed here as it will be automatically set via code, but it will still need to be aligned.
Open up the Anchor Presets again and, while holding Alt and Shift, choose Top-Left. To make the Text not quite touch the edges the PosX can be increased slightly, the Pos Y can have a slightly negative value, Width should be a bit less than 290 and the Height a bit less than 60. Here are some recommended settings:
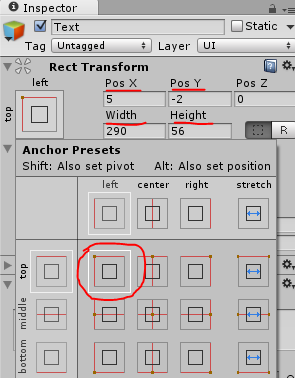
The next section is the list of Guild Members. Just before creating the actual scroll area it would make sense to have a headers panel that will sit above it. Right click on GuildPanel and choose UI -> Panel. Name this panel “HeaderPanel”. Open up the Anchor Presets window and, while holding Alt and Shift, click on Top-Center. Then set the Width to 300 and the Height to 20. The Panel will want to be moved down below the MotdPanel, so the Pos Y will be set to roughly -77:
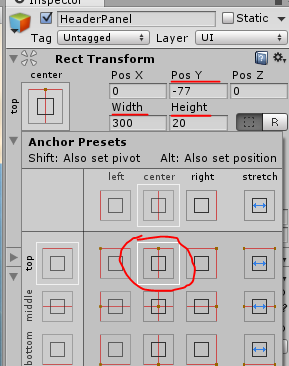
Three Text objects will need to be added as the three category headers. Right click on HeaderPanel and choose UI -> Text. Rename the new Text object to “NameHeader”. Set the Height to 20 and align it so it’s near the left-hand side of the HeaderPanel. Change the Text of it to “Name”.
Duplicate NameHeader (by selecting it and pressing Ctrl + D), rename the new object to “RankHeader” and move it along a bit so it’s not overlapping. Change the Text of it to say “Rank”. Repeat this process again for “Level”.
Moving onto the List of Members, create another panel by right clicking on GuildPanel and choosing UI -> Panel. Rename this one to “MemberList”. Set the Anchor Preset and positions/sizes based on the image below:
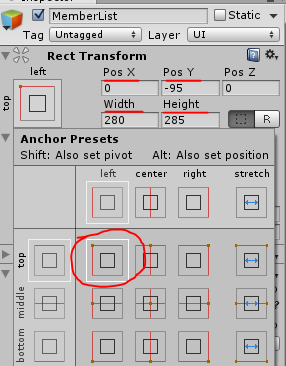
Note that width is less than 300. This is to allow 20 pixels for the scroll bar to go down the right hand side.
For a scroll system to work two components need to be added to this MemberList panel: Scroll Rect and Mask. Add these two components to the MemberList.
Inside the MemberList a Grid system is created to draw all the member entries. To achieve this, right click on MemberList and choose UI -> Panel from the menu. Rename the new panel to “Grid”. Don’t alter any anchor, position or size settings yet. Next step is to add two components to it: Grid Layout Group and Content Size Fitter.
In the Grid Layout Group component change the Cell Size so the width matches the width of MemberList (default 280) and set the height to 20 or a similar value. Change Constraint to “Fixed Column Count” and set “Constraint Count” to 1, so only 1 column will show up per Guild Member. In the Content Size Fitter component, set Vertical Fit to “Preferred Size”. Now head up to the Anchor Preset and, while pressing Alt and Shift, click on Top-Stretch:
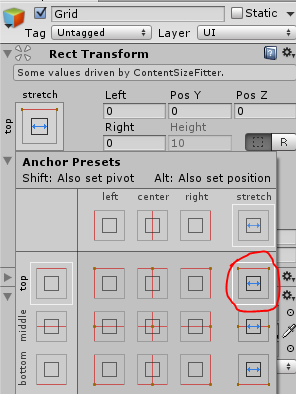
This aligns it with the top of the MemberList and tells it to stretch across the width of it. That’s all that needs to be done on the MemberList for the moment. A prefab will be created later that will be used as the Member entry inside this scrollable grid.
A scrollbar will also need to be created to allow the player to scroll up and down the MemberList. Right click on GuildPanel and choose UI -> Scrollbar. Change the Direction property on the Scrollbar component to “Bottom To Top” and the actual scrollbar will visibly change. Set the Anchor, position and sizes to match:
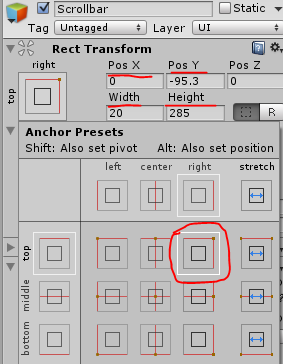
This lines it up with the right hand side of GuildPanel and has the same height as the MemberList. Select the MemberList again and drag the Scrollbar into the “Vertical Scrollbar” property. This links the scrollbar with the ScrollRect, so when the player drags the scroll bar it will change the scroll rect.
Finally, a Panel will be created at the bottom for the buttons. Right click on GuildPanel and choose UI -> Panel. Rename the panel to “ButtonsPanel”. Set the Anchor, position and sizes as follows:
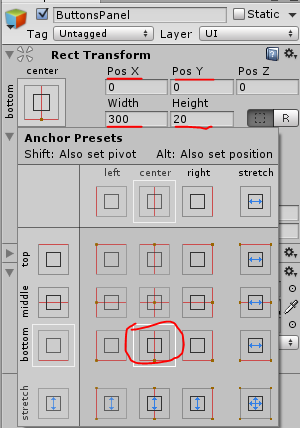
The only difference here is it is being anchored to the bottom of the GuildPanel as that is where it is located. Now a couple of buttons need to be created that will sit in this ButtonsPanel.
Right click on ButtonsPanel and choose UI -> Button. Rename the button to “AddMember” and set the Width to 100 and Height to 20. Adjust the position and/or anchors to move it to the left side of the ButtonsPanel. Change the text in the Text object of the button to say “Add Member”. Duplicate the button (Ctrl + D) and rename it to “Settings”. Adjust the position of it so it’s not on top of the AddMember button and alter the text in the Text child to say “Guild Settings”.
With everything done the Hierarchy for the GuildPanel should look similar to the image below, along with what it looks like in Game view:
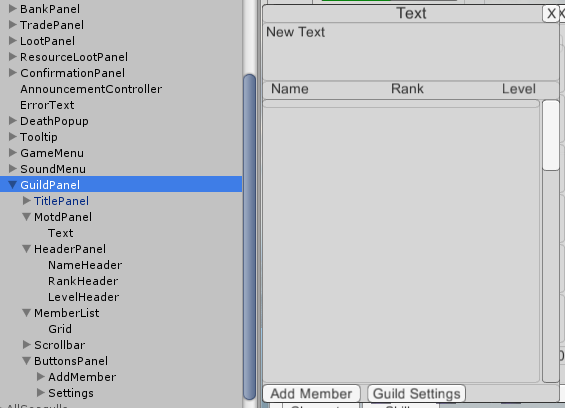
That wraps up the creation of the Guild Panel. Things could be tidied up a bit, but it’s not ha igh priority. The next thing is to write the scripts to make the UI work.
Step 3: Creating the GuildMemberEntry Prefab and Script for the Prefab
To make data show up in the UI and to have things happen when buttons are clicked, C# scripts are written and then added as components on the UI. For the Guild UI two scripts are needed, one for the main panel, and one for the member entry prefab that will fill up the MemberList.
To make the code for getting a scrolling list working much simpler, an existing script has been added to the Atavism project called UList.cs. This script provides the functions necessary to fill in the list with as many entries as needed.
With that knowledge, the first script to create is UGUIGuildMemberEntry.cs, which will be placed on the GuildMemberEntryPrefab when it is created. Go to the AtavismObjects/Scripts/UGUI folder and create a new C# Script called UGUIGuildMemberEntry. Open up the script and add at the top:
using UnityEngine.EventSystems;
using UnityEngine.UI;
This allows the use of the UI and EventSystems objects that Unity provides.
Next, a few Text variables need to be added to the class so they can be updated with the information about the Guild Member. Looking back at Step 1, three columns were going to be shown: Name, Rank and Level. Text objects will need to exist in the Guild Member prefab to show that data, so add the following lines of code before the Start() function:
public Text nameText;
public Text rankText;
public Text levelText;
By making them public they will show up in the Inspector in the Unity Editor, allowing Text objects to be dragged into them.
It will be useful to store the AtavismGuildMember data that this prefab represents when it is added to the list, but it will be filled by code, so don’t make it public:
AtavismGuildMember guildMember;That is all the variables that will be needed, but two functions will be needed: one for assigning the AtavismGuildMember to this script and one for handling when this GuildMemberEntry is clicked or selected.
The first function will look like:
public void SetGuildMemberDetails(AtavismGuildMember guildMember) {
	this.guildMember = guildMember;
	nameText.text = guildMember.name;
	string rankName = AtavismGuild.Instance.Ranks[guildMember.rank].rankName;
	rankText.text = rankName;
	levelText.text = guildMember.level.ToString();
}
It takes in an AtavismGuildMember object, then stores it and updates the text of the nameText, rankText and levelText. Note that the name of the rank had to be obtained from the AtavismGuild class, by getting the AtavismGuildRank data for the members rank, then getting the name of it. The guildMember.level had to be converted to a string so it could be set as text.
Before jumping into the second function, a moment needs to be taken to think about what should happen when a Guild Member is selected from the MemberList. Two things could happen: opening a new UI window to show more member details, or just “selecting” the Guild Member, then allowing other buttons to use that selected member when pressed. The second option will be explained here. So when the player clicks on this Guild Member Entry the code needs to keep track of which member has been selected. The easiest way to do this is to jump into the AtavismGuild class and add a Property to keep track of it. Add this code to the bottom of the AtavismGuild class:
public AtavismGuildMember SelectedMember {
	get;
	set;
}
This is an automatic property which allows not having to create a variable as well as the property.
With the property made, add the GuildMemberClicked() function to the UGUIGuildMemberEntry class:
public void GuildMemberClicked() {
	AtavismGuild.Instance.SelectedMember = guildMember;
}
This will set the SelectedMember property to the guildMember that was saved to this Guild Member Entry.
Note: Delete the Update() function as it isn’t being used and will use up resources if left.
Save the scripts and head back into Unity. Make sure it compiles the scripts fine.
Inside the AtavismObjects/Scripts/UGUI folder, there is a folder called “UI Prefabs” that holds all the prefabs used by the UI. Head into that folder and duplicate the QuestListEntry prefab (select it and press Ctrl + D). Rename it to “GuildMemberEntry”. Drag this new prefab into the Grid object (child of MemberList):
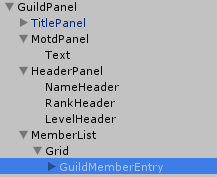
It will show up in the MemberList UI to give a good feel for how it looks.
The prefab currently only has 1 Text object in it, so rename “Text” to “NameText”, then duplicate it twice and rename the others “RankText” and “LevelText”. Change the Anchor Preset to Middle-Left for all of them, then move the RankText and LevelText along so they sit nicely below the matching headers. If wanted, also change the default Text in each one. It should come out looking something like:
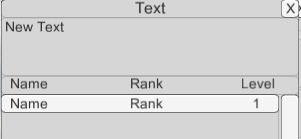
Go back to the parent object (GuildMemberEntry) and now remove the UGUI Quest List entry component and add the newly created UGUI Guild Member Entry. The three variables created will show up with the text “None” inside. Drag the three Text children (NameText, RankText and LevelText) into those three slots so it looks like:

The Texts are now linked up, the last thing to do on this prefab is set up the On Click handler in the Button component. Drag the GuildMemberEntry into the slot in the On Click section and then choose UGUIGuildMemberEntry -> GuildMemberClicked function from the drop down:
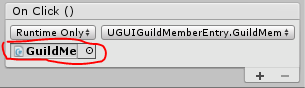
Just before saving the prefab it may be worth quickly taking a look at the Highlighted Color setting on the Button component. If wanted, change it to another color that will stand out more. It will be used to indicate which Guild Member is selected.
Now apply the changes to the GuildMemberEntry prefab:
And delete it from the scene. It can be a good idea to save the project after making any changes to prefabs.
Step 4: Creating the Guild Panel Script
With the GuildMemberEntry prefab and script sorted the script for the GuildPanel can be created. Head into the AtavismObjects/Scripts/UGUI folder and create a new C# script called “UGUIGuildPanel”.
Open up the script and add at the top:
using UnityEngine.UI;
using System.Collections.Generic;
Then update the class declaration from:
public class UGUIGuildPanel : MonoBehaviour {
public class UGUIGuildPanel : MonoBehaviour {to:
public class UGUIGuildPanel : UIList<UGUIGuildMemberEntry> {So the class inherits from UIList, and telling the UIList this will be using the UGUIGuildMemberEntry as the cells in the list.
By inheriting from UIList, two functions need to be added: NumberOfCells() and UpdateCell(). The first should work out how many cells should be shown – nice and easy as the number of members in the Guild can be easily retrieved from AtavismGuild. The second is run whenever the UIList code is told it needs to run an update on all the cells. It makes sense to call the SetGuildMemberDetails() function on the UGUIGuildMemberEntry to set the details when the cell does get updated. The functions will look like:
public override int NumberOfCells ()
{
	int numCells = AtavismGuild.Instance.Members.Count;
	return numCells;
}

public override void UpdateCell (int index, UGUIGuildMemberEntry cell)
{
	cell.SetGuildMemberDetails(AtavismGuild.Instance.Members[index]);
}
With the UIList implementation sorted, the rest of the GuildPanel script can be filled in. First a couple variable needs to be added for the objects. Add at the top of the UGUIGuildPanel class:
public UGUIPanelTitleBar titleBar;
public Text guildMotd;
The first variable is for the title bar that got added to the GuildPanel. This is to allow the text on it to change to the Guild Name, and also set up the Close button to hide the panel. The second is simply the guildMotd text.
From here a bunch of functions need to be created to bring it all together including:
- An updater that gets the information from the AtavismGuild class and updates the titleBar and guildMotd, along with telling the Cells to refresh.
- An event handler that will run when there has been an update event sent from the AtavismGuild class.
- A Show() function to run when the panel should be shown.
- A Hide() function to run when the panel should be hidden.
- An Awake() function to run when the script is first loaded in the scene
- An OnDestroy() function to run when the object is being destroyed (such as when the player is changing scene).
The update function will look like:
public void UpdateGuildDetails() {
	if (AtavismGuild.Instance.GuildName == null || AtavismGuild.Instance.GuildName == "") {
		Hide();
		return;
	}

	titleBar.titleText.text = AtavismGuild.Instance.GuildName;
	guildMotd.text = AtavismGuild.Instance.Motd;

	// Delete the old list
	ClearAllCells();

	Refresh();
}
It first checks if the player is in a Guild by looking at the GuildName property from AtavismGuild. If they aren’t it will call the Hide() function (defined below) and will return. Carrying on, it will set the text on the title bar to the name of the Guild, and set the guildMotd text as well. It then clears all cells in the MemberList and tells it to Refresh() which will recreate all the cells in the MemberList again and calls the UpdateCell() function on them all. The ClearAllCells() and Refresh() functions are both defined in UList.cs
The event handler is a standard function found in many of the AtavismScripts and looks like:
public void OnEvent(AtavismEventData eData) {
	if (eData.eventType == "GUILD_UPDATE") {
		UpdateGuildDetails();
	}
}
The name OnEvent is a pre-designed function that is called by the AtavismEventSystem when events are sent out. While most functions listed here can be called anything, the OnEvent must be called that for the Event System to find it. It just checks the event Type to make sure it is a “GUILD_UPDATE” (which was defined/sent multiple times in the AtavismGuild class) then runs the UpateGuildDetails() function.
Next is the creation of the Show() and Hide() functions. These are added to almost all panel scripts to make it easier to control the hiding and showing of panels. The functions look like:
public void Show() {
	GetComponent<CanvasGroup>().alpha = 1f;
	GetComponent<CanvasGroup>().blocksRaycasts = true;
	UpdateGuildDetails();
}

public void Hide() {
	GetComponent<CanvasGroup>().alpha = 0f;
	GetComponent<CanvasGroup>().blocksRaycasts = false;
}
The Show() function gets the CanvasGroup Component (still to be added) and sets alpha to 1, so the panel will be fully visible and tells it to start blocking raycasts, so players can’t click through it. It then calls the UpdateGuildDetails() function to re-set all the data in the GuildPanel/MemberList.
The Hide() function simply does the opposite of Show() and sets alpha to 0 and tells it to not block Raycasts anymore, so it’s like it isn’t there.
The last two functions, Awake() and OnDestroy() and Unity predefined functions that will run when the script is first loaded, and when the script is destroyed respectively. The Awake() function will look like:
void Awake () {
	if (titleBar != null)
		titleBar.SetOnPanelClose(Hide);
	Hide ();

	AtavismEventSystem.RegisterEvent("GUILD_UPDATE", this);
}
It verifies the titleBar has been set, and if so, it will link up the Hide() function to when the player clicks the close button on it. The Hide() function is then called to ensure the GuildPanel is not visible when the player first logs in. The last line registers this script to listen for the “GUILD_UPDATE” event, so the OnEvent() function will be run when “GUILD_UPDATE” is sent out.
The OnDestroy() function simply removes the registration for the “GUILD_UPDATE” event:
void OnDestroy()
{
	AtavismEventSystem.UnregisterEvent("GUILD_UPDATE", this);
}
If this isn’t done, when the player changes scenes the registration done in Awake() will still exist, but not point to an existing object anymore which can cause issues and slow down performance.
Note: Delete the Update() function as it isn’t being used and will use up resources if left.
When the UGUIGuildPanel script is finished it needs to be added as a component on the GuildPanel object. Drag the Grid object (under MemberList) into the Grid slot, the GuildMemberEntry prefab from the AtavismObjects/Scripts/UGUI/UI Prefabs folder into the Cell Prefab slot, the TitlePanel (under GuildPanel) into the Title Bar slot and the Text object under MotdPanel into the Guild Motd slot:
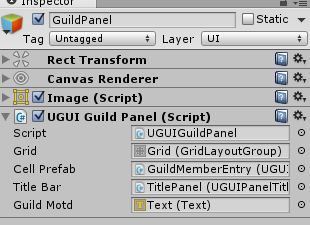
Then add the Canvas Group component to the Guild Panel as well. This allows hiding and showing the GuildPanel while keeping the object turned on the whole time.
The Guild Panel is now ready to go… but how does the player make it show up?
There are two, or possibly more, options here: Create a button in the UI that will toggle the GuildPanel, and/or set up a hotkey that will toggle the UI when a key is pressed. Both will be shown here.
Before creating a button in the scene a Toggle() function will be needed to do the toggling between Show() and Hide(). But before the Toggle() function can be written, the state of whether or not the GuildPanel is showing will need to be tracked as well. A bool variable will do the trick.
Add this variable to the UGUIGuildPanel class:
bool showing = false;Then the Show() and Hide() functions should be updated to change the value of “showing”. Add:
showing = true;to Show() and:
showing = false;to Hide().
Now, add the Toggle function:
public void Toggle() {
	if (showing) {
		Hide ();
	} else {
		Show ();
	}
}
Nice and easy. While the script is still open it would make sense to add in the KeyCode to call Toggle() as well. Add the following variable to the UGUIGuildPanel class:
public KeyCode toggleKey;Set it as public so it can be set in the Inspector.
The question now is, how does the script know that the key was pressed? The Update() function will have to be re-added as it now has a purpose. Each frame it will check to see if the toggleKey is pressed. It will look like:
void Update () {
	if (Input.GetKeyDown(toggleKey) && !ClientAPI.UIHasFocus()) {
		Toggle();
	}
}
Note that there is another part to the if statement: !ClientAPI.UIHasFocus(). That is added so if the player is typing into the chatbox or other InputText field this will not run. The player won’t want the Guild Panel opening or closing each type they press the key while typing a message, so this will stop it.
That’s the KeyCode system handled. Save the script and head back into Unity. There will now be a toggleKey property on the GuildPanel object which can be set to whatever key is wanted. A button to call Toggle() can now be set up as well.
The button could be placed anywhere, but it would make sense to add it to the “Toolbar” object under “Canvas”, as it houses other toggle buttons for different Panels. Increase the width of the Toolbar to add room for another button (by default the buttons were 30 wide, so add another 30 to the Width”. Duplicate one of the buttons under the Toolbar, such as “World Builder”, move it along so it isn’t on top of the old button and rename it.
In the OnClick section drag in the GuildPanel object and change the function to UGUIGuildPanel -> Toggle:
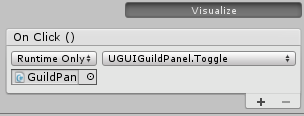
And that is all done. The Guild Panel is now ready to go and can be opened by either pressing the key set on toggleKey or by clicking the button just set up.
Step 5: Allowing players to invite others to the Guild
Now that players can create a Guild and bring up the UI, the next step is to allow players to invite others to the Guild. The process of inviting a member to the guild involves a few steps:
- Guild Member sends the invite request to the server with a player’s name, or alternatively their OID.
- The server will send a message to the invitee, if they exist
- A popup window will show up on the invitee’s client with a Yes/No option
- The invitee’s response will be sent back to the server where they will be added to the Guild if they chose yes.
Steps 1 and 4 both involve sending a message to the server. The first message be sent through the command extension message that was created in Part IV of the Guild system tutorial, and the response message was also created then as well. So the good news is only 1 message will need to be created, and that will be from the Server to the Client.
1: Sending the Invite Request
So, getting into it, the first step will be to create a function in the UGUIGuildPanel script that will run when the “AddMember” button is clicked. It will check if the player has a suitable target and send the invite command for the target, or if there is no target it will bring up a UI window for the player to type in the name of who to add.
Just before the function can be created, a new variable will need to be added to the UGUIGuildPanel class to represent the Panel that will popup, along with an InputField for the name as well. Add these 2 variables:
public RectTransform invitePopup;
public InputField inviteNameField;
The function for when the AddMember button is clicked will look like:
public void AddMemberClicked() {
	if (ClientAPI.GetTargetOid() > 0 && ClientAPI.GetTargetObject().CheckBooleanProperty("combat.userflag")) {
		AtavismGuild.Instance.SendGuildCommand("invite", OID.fromLong(ClientAPI.GetTargetOid()), null);
		return;
	} else {
		invitePopup.gameObject.SetActive(true);
		inviteNameField.text = "";
			EventSystem.current.SetSelectedGameObject(inviteNameField.gameObject, null);
	}
}
It first checks if the player has a target (the ClientAPI.GetTargetOid() call) and then whether the target is a player (by checking the combat.userflag property). If the target does exist, and is a player, it will use their oid as the property for the sending of the guild command. If no suitable target exists, it sets the invitePopup to active and clears the name InputField, along with setting focus to the inviteNameField so the player can start typing in it straight away.
Note that after adding the code above, the line starting with EventSystem will give an error. Another “using” statement needs to be added to the top of the file:
using UnityEngine.EventSystems;A second function will need to be created for when the player has entered a name in the InvitePopup and clicked the “Send Invite” button that will be added in it. The function will look like:
public void AddMemberByNameClicked() {
	if (inviteNameField.text != "") {
		AtavismGuild.Instance.SendGuildCommand("invite", null, inviteNameField.text);
		invitePopup.gameObject.SetActive(false);
	}
}
It will check if there is any text in the inviteNameField, and if so, it will send the guild command to invite based on the name typed in. The last line of code turns the invitePanel off again.
The next step is to create the invitePanel. Create a new UI Panel as a child of the GuildPanel object, resize/position as desired, and add the TitlePanel prefab (from AtavismObjects/Scripts/UGUI/UI Prefabs). Change the text on the Text child to something like “Add Guild Member”. Add a Text object, an InputField and a Button to the InvitePanel. Set the text on the Text object to something like “Player To Invite:” and set the text on the Text child of the Button to say “Send Invite”. Add an OnClick event to the Button and drag in the Guild Panel, then set the function to UGUIGuildPanel.AddMemberByNameClicked.
Select the GuildPanel and drag in the InvitePanel into the Invite Popup property box, and the InputField into the Invite Name Field. Finally, add an OnClick event to the AddMember button (in the ButtonsPanel) and drag in the GuildPanel. Set the function to UGUIGuildPanel.AddMemberClicked.
Everything will look roughly like:
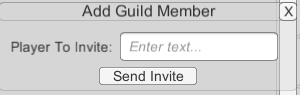
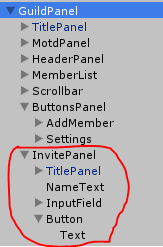
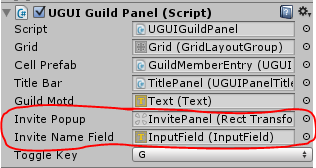
The UI is now set up, so the scene can be saved. One thing that hasn’t been covered yet is hiding the InvitePopup when the GuildPanel first is shown. It would make sense to add:
invitePopup.gameObject.SetActive(false);to the end of the Show() function in the UGUIGuildPanel.cs file.
The first half of the invite process is now handled. The player can send an invite request to the server, but the server is yet to handle it.
2: Handling the Invite request on the Server and sending the invite to the target
The Client will now send the “invite” Guild Command when the player tries to invite a player to the Guild, so now the GuildCommandHook (created in Part 4 of this series) on the server needs to be filled in to handle the command.
Open up the GuildPlugin.java file and head to the GuildCommandHook class. Code will now be added to this class to read in the data sent in the message, then to pass on the data to the Guild class which will actually perform the command.
The GuildCommandHook will now look something like:
class GuildCommandHook implements Hook {
		public boolean processMessage(Message msg, int flags) {
			ExtensionMessage gmMsg = (ExtensionMessage) msg;
			/*
			 * get some info about player
			 */
			OID oid = gmMsg.getSubject();
			int guildID = -1;
			try {
				guildID = (Integer) EnginePlugin.getObjectProperty(oid, WorldManagerClient.NAMESPACE, GUILD_PROP);
			} catch (NullPointerException e1) {
			}

			if (!guilds.containsKey(guildID)) {
				return true;
			}

			String commandType = (String) gmMsg.getProperty("commandType");
			OID targetOid = (OID) gmMsg.getProperty("targetOid");
			String data = (String) gmMsg.getProperty("data");
			guilds.get(guildID).handleCommand(oid, commandType, targetOid, data);

			return true;
		}
	}
It first gets the sender of the command, then gets the ID of the Guild the player is in. If a valid Guild exists it gets the command data and passes it through to a function called handleCommand() in the Guild class. The handleCommand() function does not exist yet, so it will need to be created. Head into the Guild.java file and add:
public void handleCommand(OID oid, String commandType, OID targetOid, String commandData) {
		// If the command is to quit the guild, deal with it before doing the permission check
		if (commandType.equals("quit")) {
			processGuildQuit(oid);
			return;
		}

		// The permission check
		if (!hasPermission(oid, commandType)) {
			EventMessageHelper.SendErrorEvent(oid, EventMessageHelper.ERROR_INSUFFICIENT_PERMISSION, 0, "");
			return;
		}

		if (commandType.equals("invite")) {
			if (targetOid == null) {
				String targetName = (String) commandData;
				try {
					targetOid = GroupClient.getPlayerByName(targetName);
				} catch (IOException e) {
					e.printStackTrace();
				}
				if (targetOid == null) {
					return;
				}
			}

			if (targetOid != null) {
				inviteNewMember(targetOid, oid);
			}
		}/* else if (commandType.equals("addRank")) {
			String rankName = (String) commandData;
			ArrayList<String> permissions = (ArrayList) commandDataTwo;
			addRank(ranks.size(), rankName, permissions);
		}*/
	}
This function is a bit of a messy one as it will handle all the different commands that can be used in the Guild system, check the user can perform the command, then call another function to actually handle the specific command. This first copy will only deal with 2 commands, but will have a lot more added in over time.
The quit command is handled before the permission check as the ability to leave a Guild does not require any permissions. The next step is to check permissions, which calls the hasPermission() function, and will send an Error Event Message to the player if they did not have sufficient permissions.
Note: the processGuildQuit() and hasPermission() functions will be detailed at the end of this section.
After the permission check the function then begins a series of if/else statements checking what the actual command was. It first checks for “invite”, but then has to verify if it got the name of a character or an OID. If it got the name it will call GroupClient.getPlayerByName to get the OID of the character. It will finally call inviteNewMember().
The next step is to create the inviteNewMember() function. It will first need to make sure the player being invited isn’t already in a Guild. If they aren’t it will send the guildInvite message to the player so the player can respond to the invitation. The player being invited will need to know the name of the Guild they are being asked to join, along with the player who invited them. The function will look like:
private void inviteNewMember(OID targetOid, OID inviterOid) {
		// First verify the target is not already in a Guild
		int targetGuild = -1;
		try {
			targetGuild = (Integer) EnginePlugin.getObjectProperty(targetOid, WorldManagerClient.NAMESPACE, GuildPlugin.GUILD_PROP);
		} catch (NullPointerException e1) {
		}
		if (targetGuild > 0) {
			//Let the inviter know that the target is already in a Guild
			EventMessageHelper.SendErrorEvent(inviterOid, EventMessageHelper.ERROR_ALREADY_IN_GUILD, 0, "");
			return;
		}

		// Send the invite request to the target
		Map<String, Serializable> props = new HashMap<String, Serializable>();
		props.put("ext_msg_subtype", "guildInvite");
    	props.put("guildName", guildName);
    	props.put("guildID", guildID);
    	String inviterName = WorldManagerClient.getObjectInfo(inviterOid).name;
    	props.put("inviterOid", inviterOid);
    	props.put("inviterName", inviterName);
    	TargetedExtensionMessage msg = new TargetedExtensionMessage(
				WorldManagerClient.MSG_TYPE_EXTENSION, targetOid,
				targetOid, false, props);
		Engine.getAgent().sendBroadcast(msg);
	}
With the invite request message now being sent to the targeted player, it’s time to handle the message on the client.
3: Handling the Guild Invite Request on the Client
When the client receives the “guildInvite” message it will cause a confirmation box to pop up on the players screen for them to confirm or deny the request. Thankfully a Confirmation Box system already exists which just requires the message to display and then what function to call when the player clicks one of the buttons.
The function that gets passed to the Confirmation Box must take two parameters: and object and a bool. It would also make sense for this function to call the RespondToGuildInvitation() function that was created in part 4 of this series. The function will go in the AtavismGuild.cs file and it will look like:
public void GuildInviteResponse(object obj, bool accepted)
{
	int guildID = (int)obj;
	RespondToGuildInvitation(inviterOid, guildID, accepted);
}
The actual message handler which makes the confirmation box pop up will look like:
public void HandleGuildInvite(Dictionary<string, object> props) {
	inviterOid = (OID)props["inviterOid"];
	string guildName = (string)props["guildName"];
	int guildID = (int)props["guildID"];
	string inviterName = (string)props["inviterName"];

	string inviteMessage = inviterName + " has invited you to join their Guild: " + guildName;
		UGUIConfirmationPanel.Instance.ShowConfirmationBox(inviteMessage, guildID, GuildInviteResponse);
}
That last line is the one that causes the Confirmation Panel to show up. Note how the last parameter is the name of the GuildInviteResponse function.
Finally, the HandleGuildInvite function needs to be registered as the Handler for the “guildInvite” message. Head to the Start() function of the AtavismGuild.cs file and add:
NetworkAPI.RegisterExtensionMessageHandler("guildInvite", HandleGuildInvite);4: Handling the players response to the Guild invitation
Now that the player can send the invite request to the server, the server can send the request to the targeted player, and that player can click a Yes/No on the confirmation box the final step is to handle the player’s response on the server.
To save a bit of time the base of the GuildInviteResponseHook on the server was already created in part 4 of this series. Head to the class now (inside GuildPlugin.java). The class needs code added to read in the player’s response and then double check again that the inviter is in a valid Guild and the invitee is now already in a Guild.