Resource Nodes Plugin
Atavism 10.5.0+

In this plugin, you can manage resource nodes in your scene (save or delete and set grid size for them).
Configuration
Resource Nodes are set up in the Unity Editor then saved to the Content Database with the Atavism Editor as well as profiles are set in the Atavism Standalone Editor.
Creating Resource Nodes
Resource nodes are GameObjects that exist in a Unity Scene. Place your Game Object in the scene and add a Resource Node component.
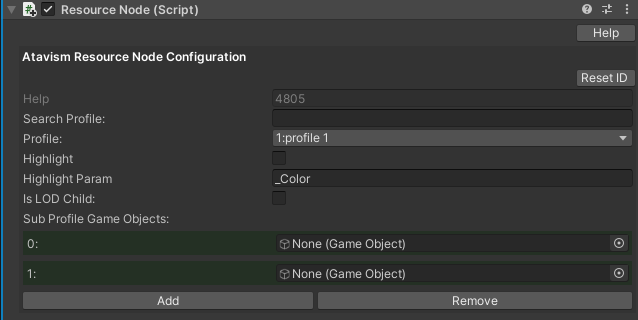
Add the Resource Drops you want to the Node and set the properties as follows:
Profile: Defines Resource Node Profile created in the Atavism Standalone Editor
Highlight: Defines if the model should be highlighted when the mouse cursor will hover over it
Highlight Param: Defines shader parameter name for Highlight
is LOD Child: Defines if the resource node has a LOD Group component
Sub Profile Game Objects: Defines subobject that can be dragged from the resource node object, to create a connection between sub-profile defined in the editor and sub-profile model that will be visible in the scene
Add as many resource nodes as you want to your scene.
Saving Resources to the database
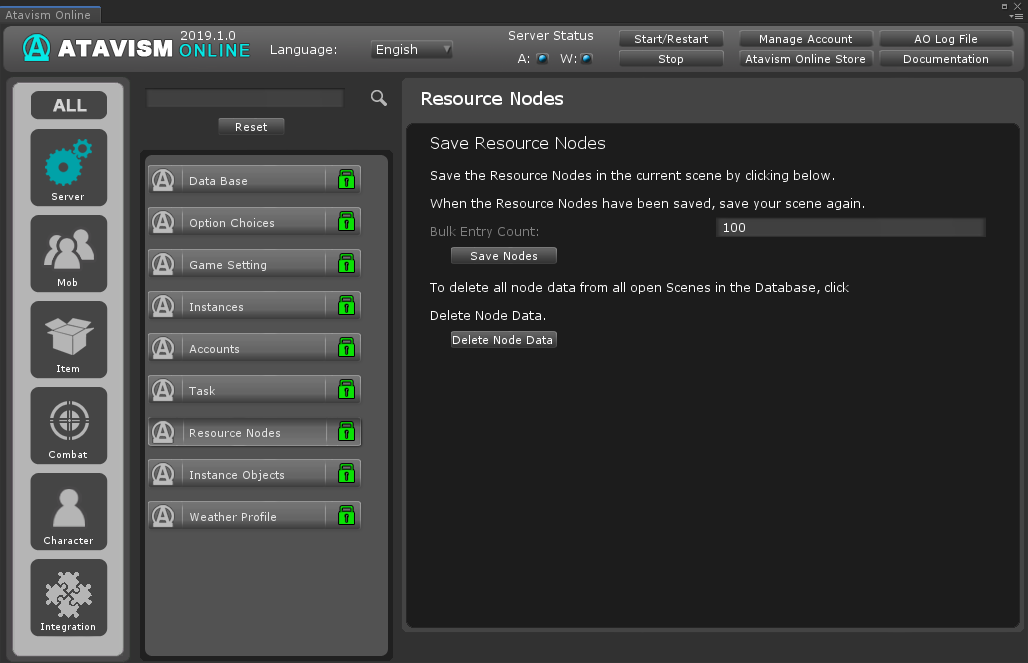
When you have your Resource Nodes added to your scene, open the Atavism Editor and go to the Resource Nodes plugin. Click on Save Nodes and wait for the “Nodes Saved” message. Now save your scene again as the Nodes would have been given an id by the database.
Restart your server and go forth harvesting those resources.
Here you can find information about how to configure Resource Nodes in Atavism.
Atavism 10.4.0-
In this plugin, you can manage resource nodes in your scene (save or delete and set grid size for them).
Configuration
Resource Nodes are set up in the Unity Editor then saved to the Content Database with the Atavism Editor.
Creating Resource Drops
The first step is to create Resource Drops that define the item and chance of a drop from a Resource Node. Resource drops are prefabs found in the Resource/Content/ResourceDrops folder. Make a duplicate of one of the existing ones, rename it, and set the values as desired. The min/max represent the minimum and maximum amounts the player might get from this node (randomized).
Creating Resource Nodes
Resource nodes are GameObjects that exist in a Unity Scene. Place your Game Object in the scene and add a Resource Node component.
Add the Resource Drops you want to the Node and set the properties as follows:
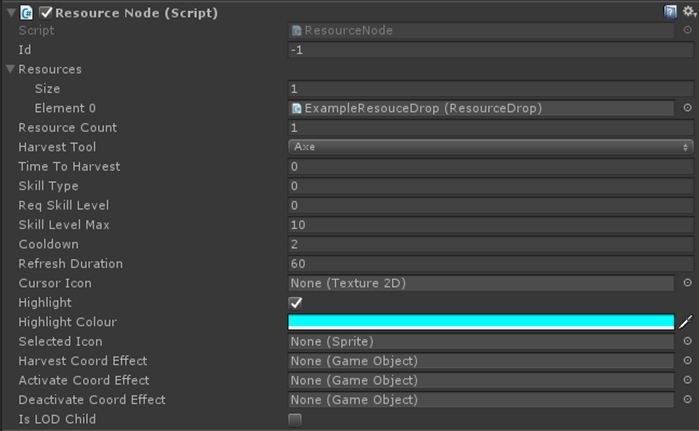
- Resource Count (how many times it can be harvested before it despawns)
- Harvest Tool (what item type the player must have equipped to harvest from this node)
- Skill Type (the skill associated with harvesting from this node)
- Req Skill Level (how high the players skill needs to be)
- Skill Level Max (the players skill will no longer increase from this node once it reaches this level)
- Refresh Duration (how long it takes the node to respawn)
- Cursor Icon (icon of the cursor when you hover over the resource node)
- Highlight (if checked then when you hover over resource node Atavism will try to change the color of texture to the selected value in Highlight Colour
- Harvest Coord Effect (the coord effect (animation/special effect) to play for when the player is harvesting from the node)
- Activate Coord Effect (the coord effect (animation/special effect) to play for when the node will be activated again after harvest)
- Deactivate Coord Effect (the coord effect (animation/special effect) to play for when the node will be harvested and deactivated)
- Is LOD Child (if resource node has LOD Group)
Add as many resource nodes as you want to your scene.
Saving Resources to the database
When you have your Resource Nodes added to your scene, open the Atavism Editor and go to the Resource Nodes plugin. Click on Save Nodes and wait for the “Nodes Saved” message. Now save your scene again as the Nodes would have been given an id by the database.
Restart your server and go forth harvesting those resources.
Note: Important thing is to have only one open scene when you are saving resource nodes.
Additional Note
If you haven’t already added the ResourceLoot.cs component to your UI prefab (or GameObject in your scene), make sure it is added to see the resource loot items pop up when harvesting.